> ## Documentation Index
> Fetch the complete documentation index at: https://docs.myaione.com/llms.txt
> Use this file to discover all available pages before exploring further.
# Quickstart
> Set up MyaiOne for Development from scratch — sign in, create your first project with the Add Project wizard, and land in your workspace ready to work.
This guide takes you from nothing to a working MyaiOne for Development project. You'll sign in, create a project (either scaffolded fresh or from code you already have), and land on your project Dashboard.
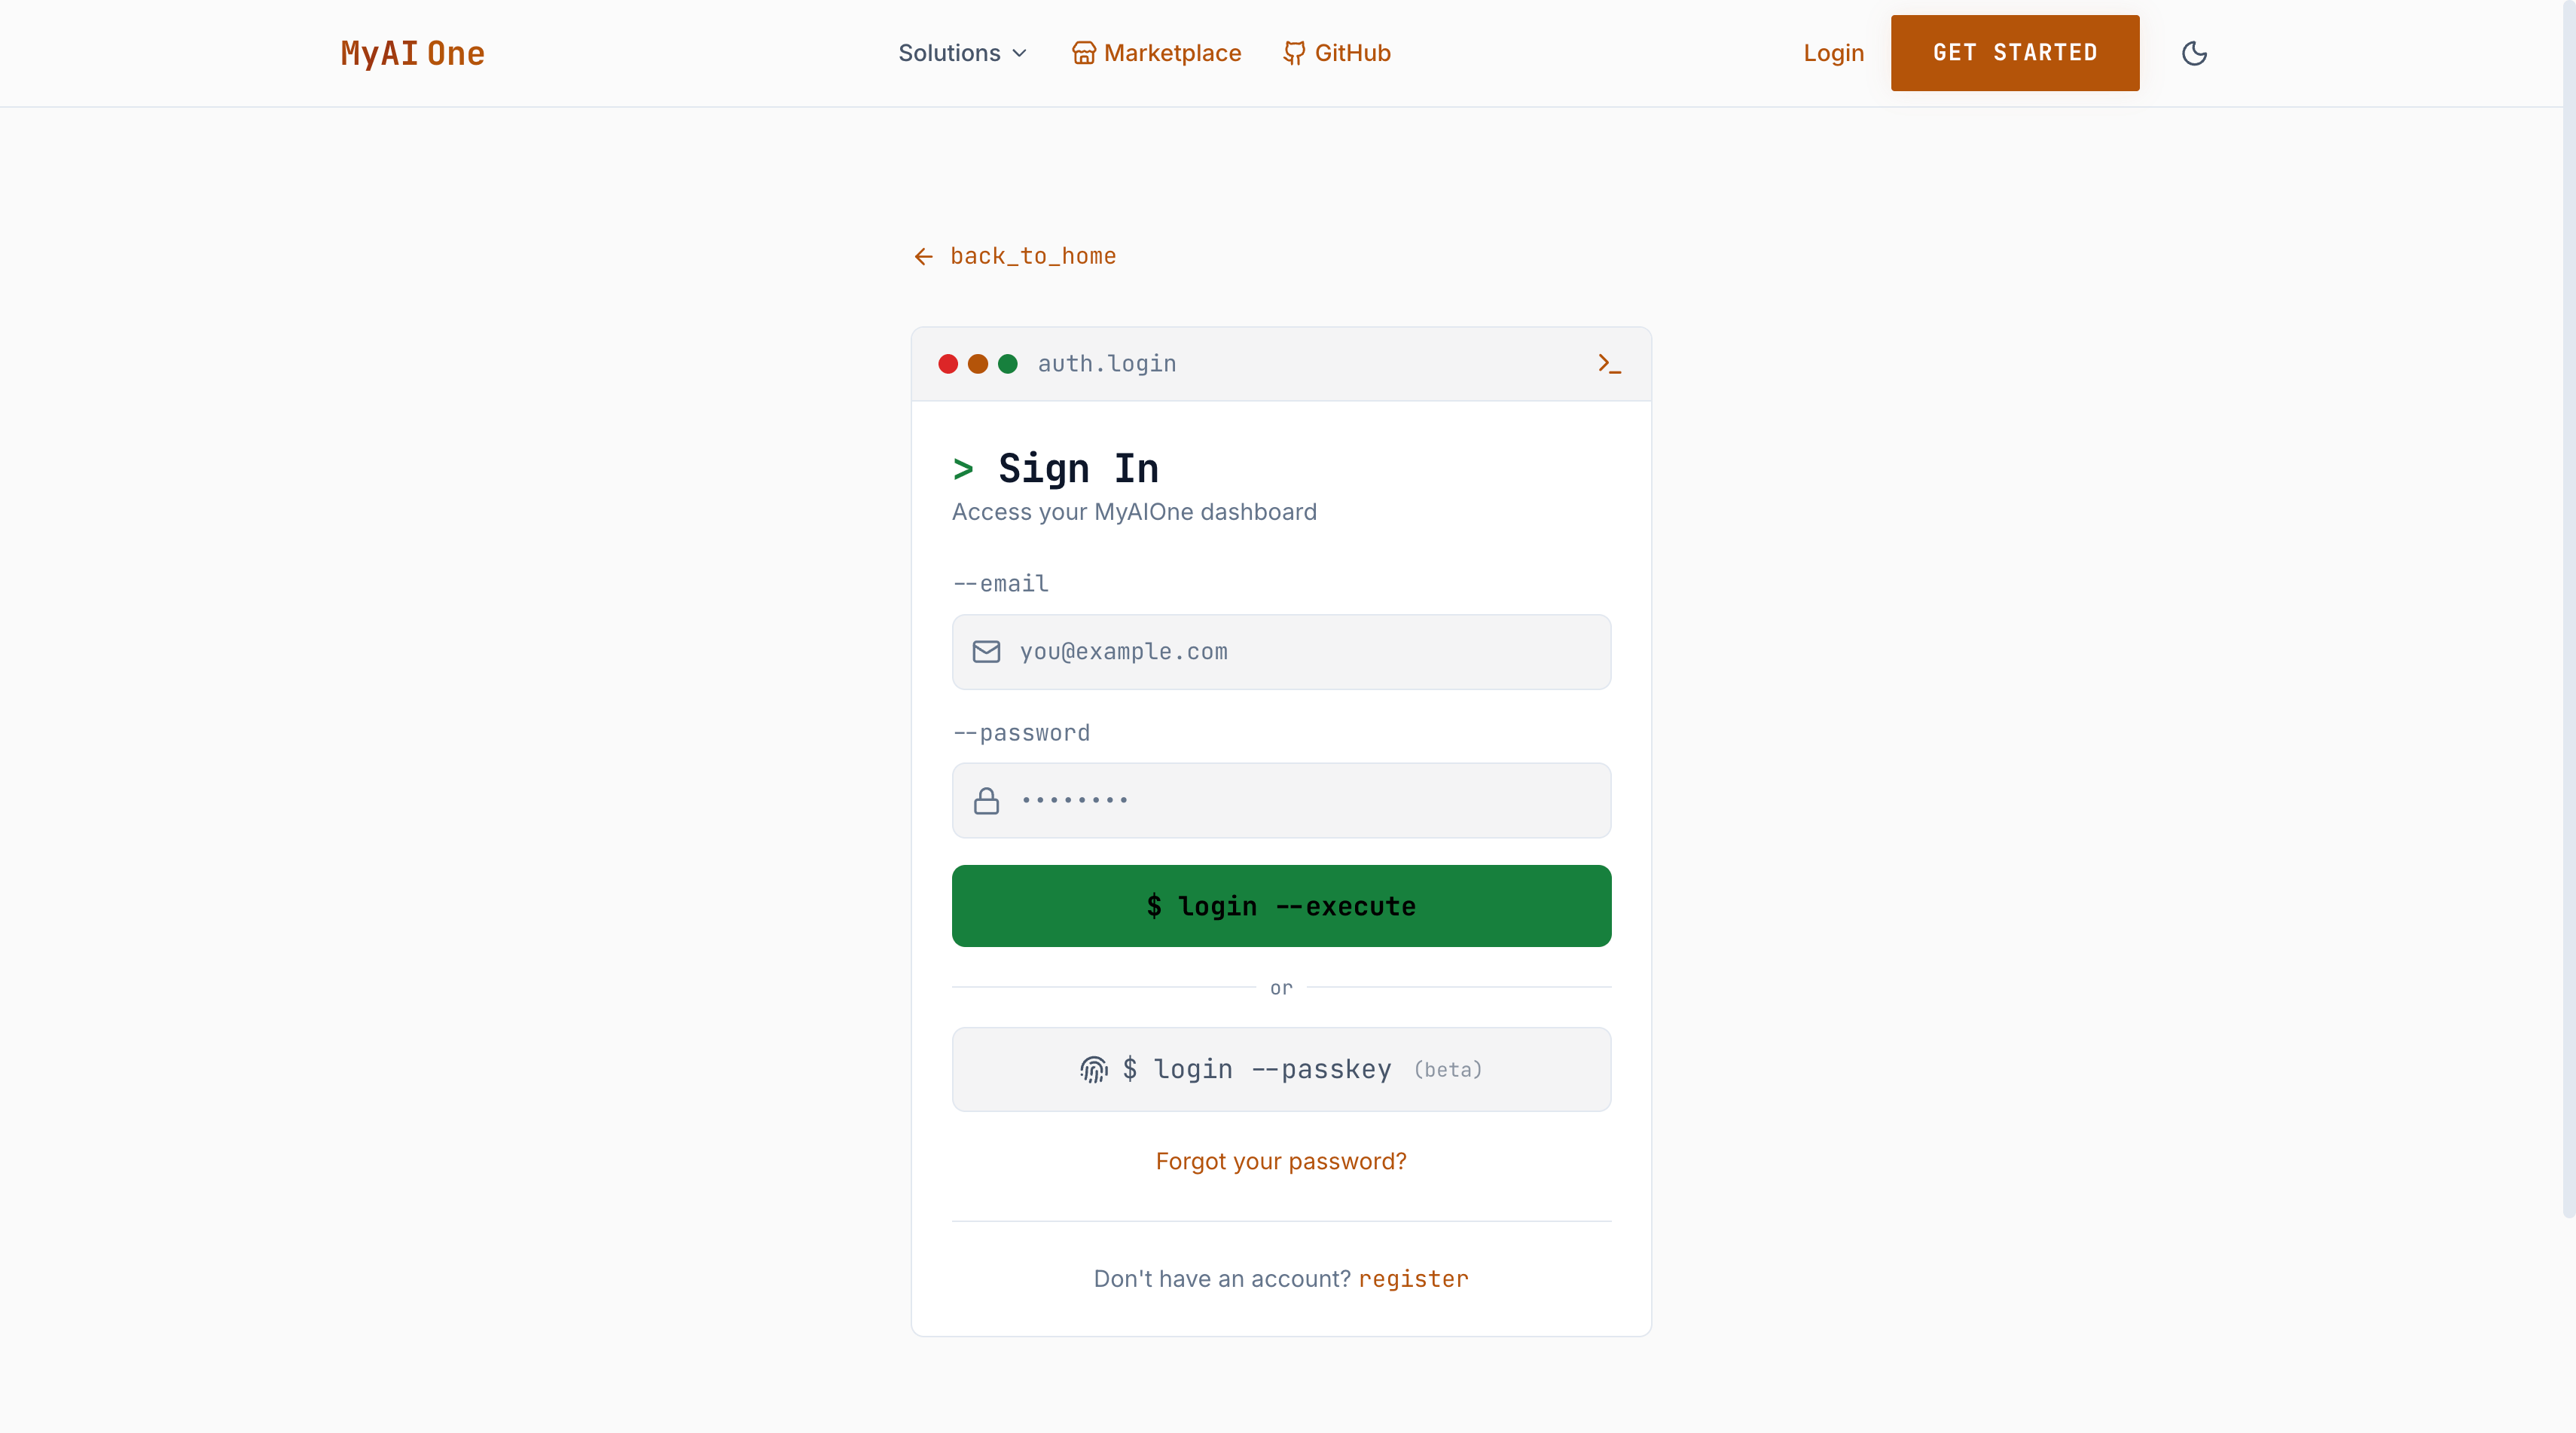
Go to [dev.myai1.ai/login](https://dev.myai1.ai/login) and sign in with your **email and password**, or use **passkey**. New to MyAIOne? Use the **register** link to create an account first.
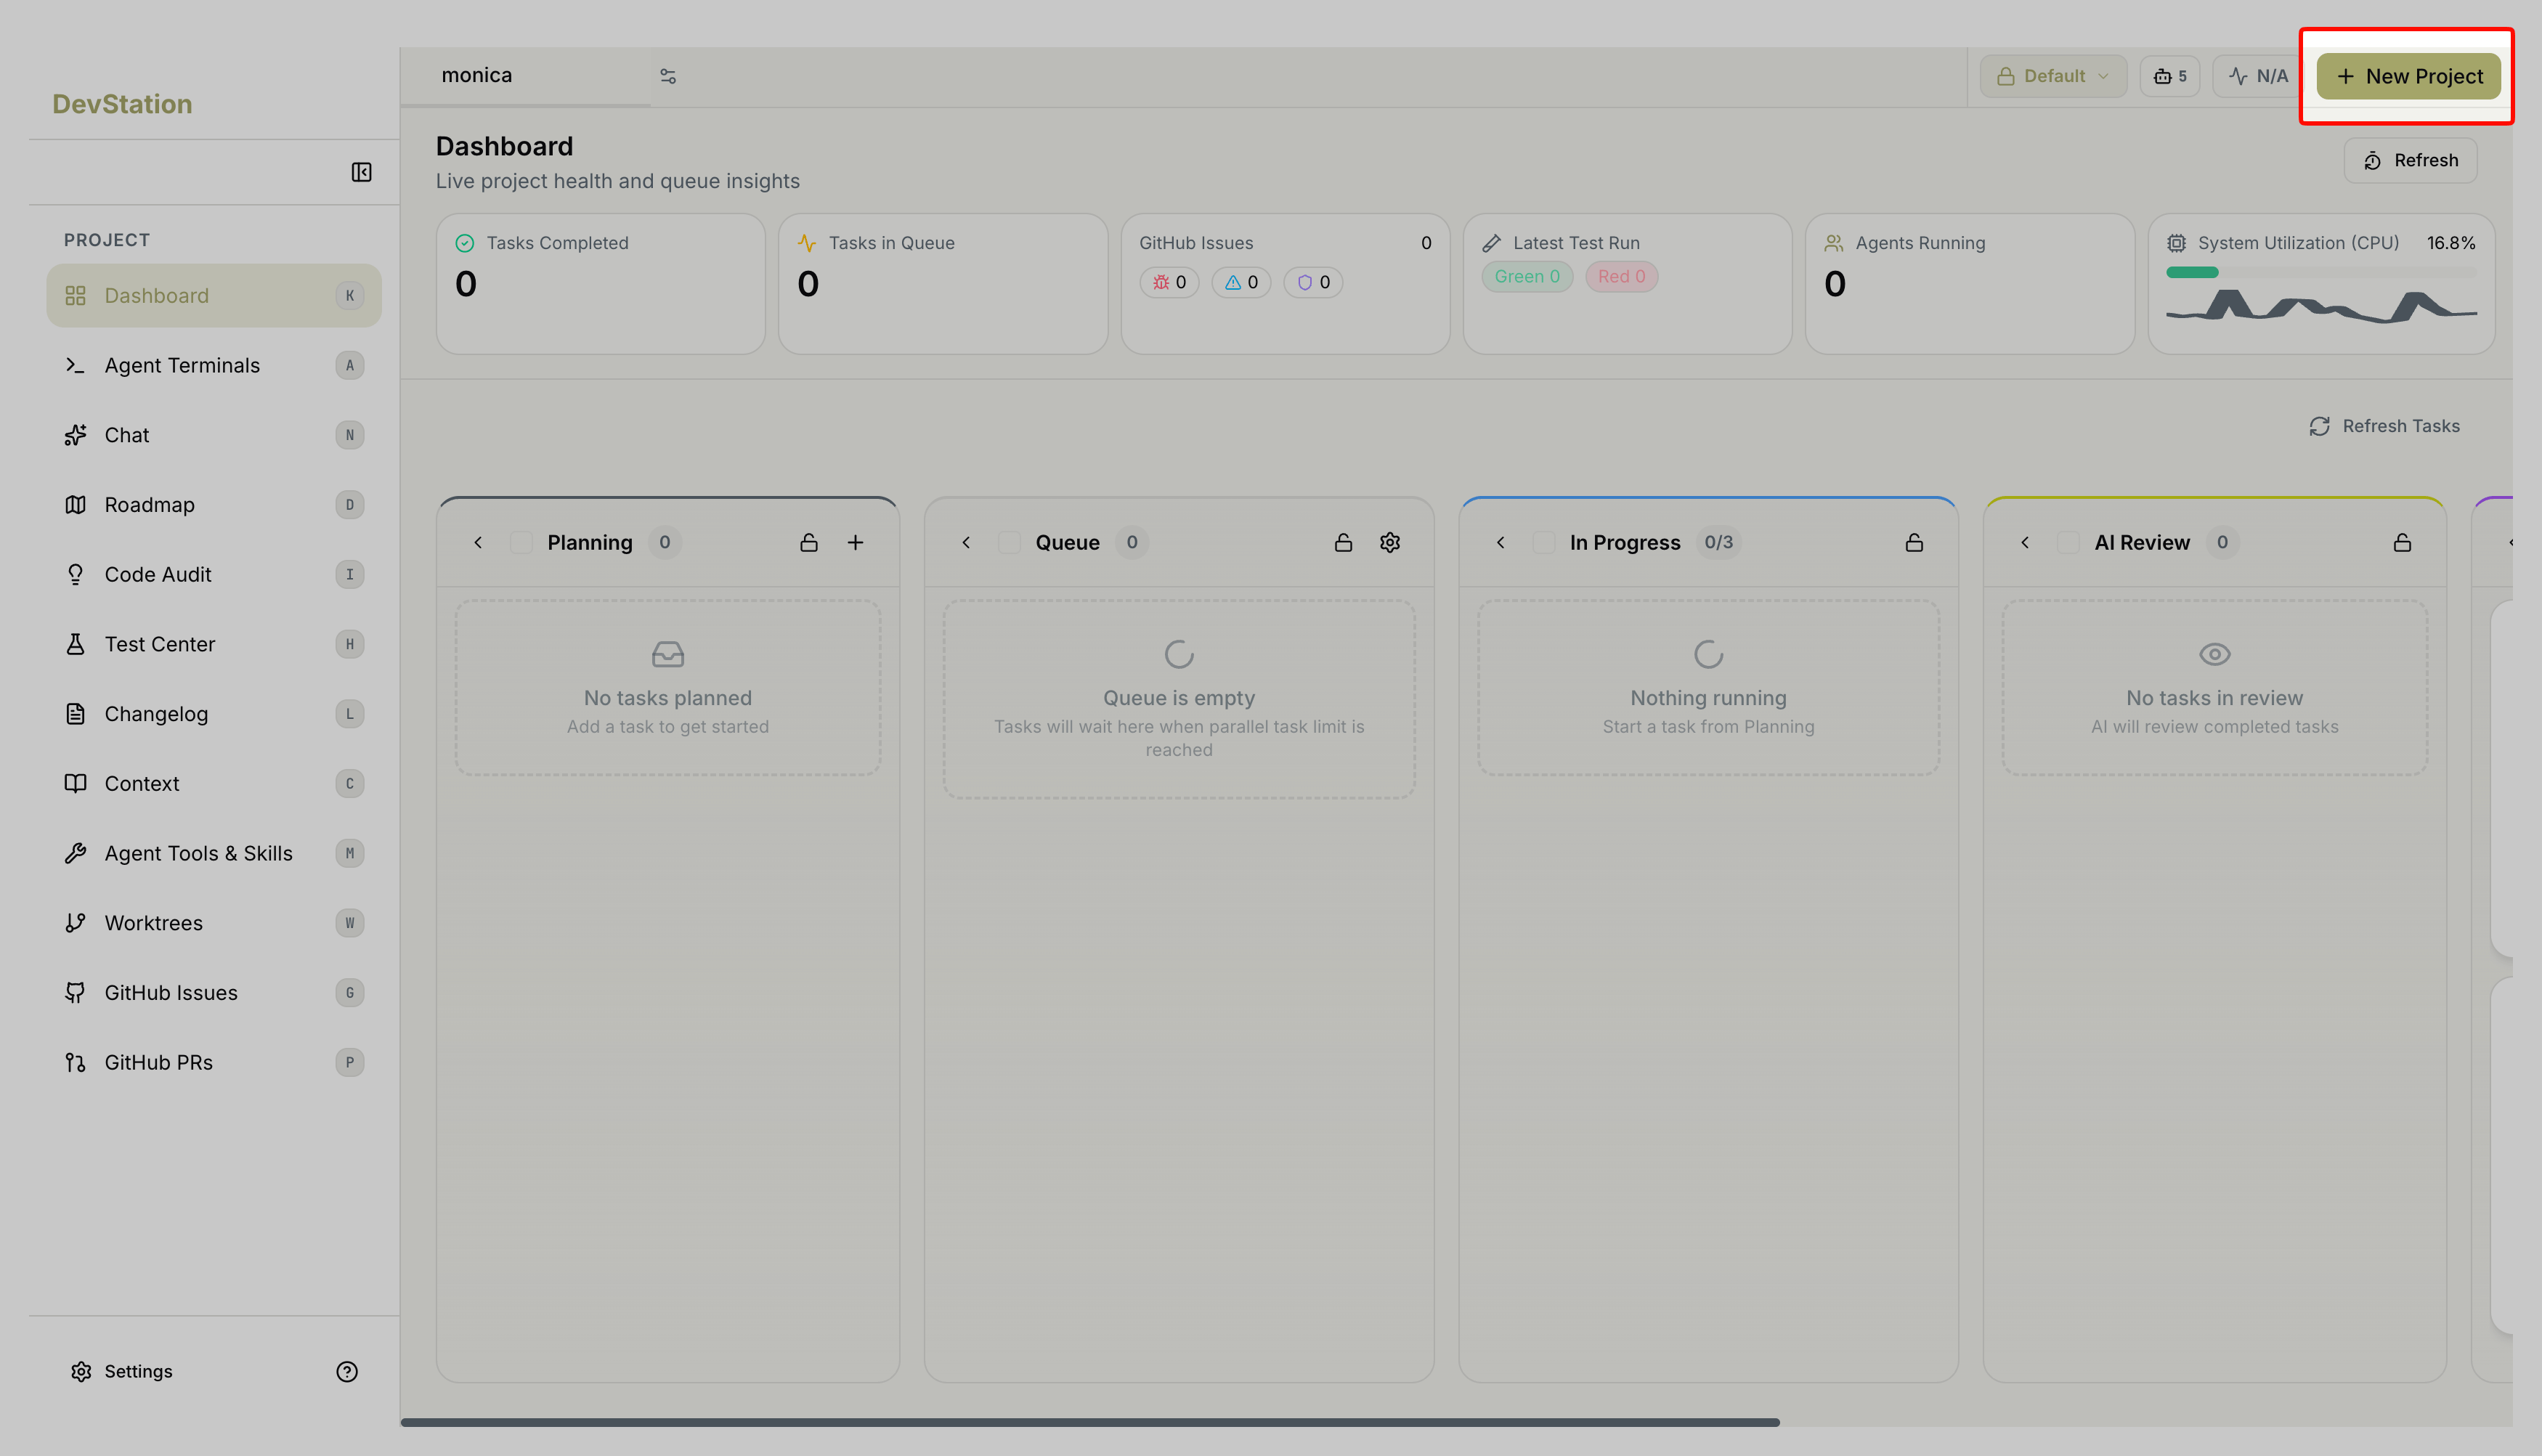
 From your MyAIOne dashboard, open the **MyaiOne for Development** rig. Inside MyaiOne for Development, click **+ New Project** (top right) to launch the **Add Project** wizard — a 5-step flow that sets up your project with optional CI/CD and a preview deploy.
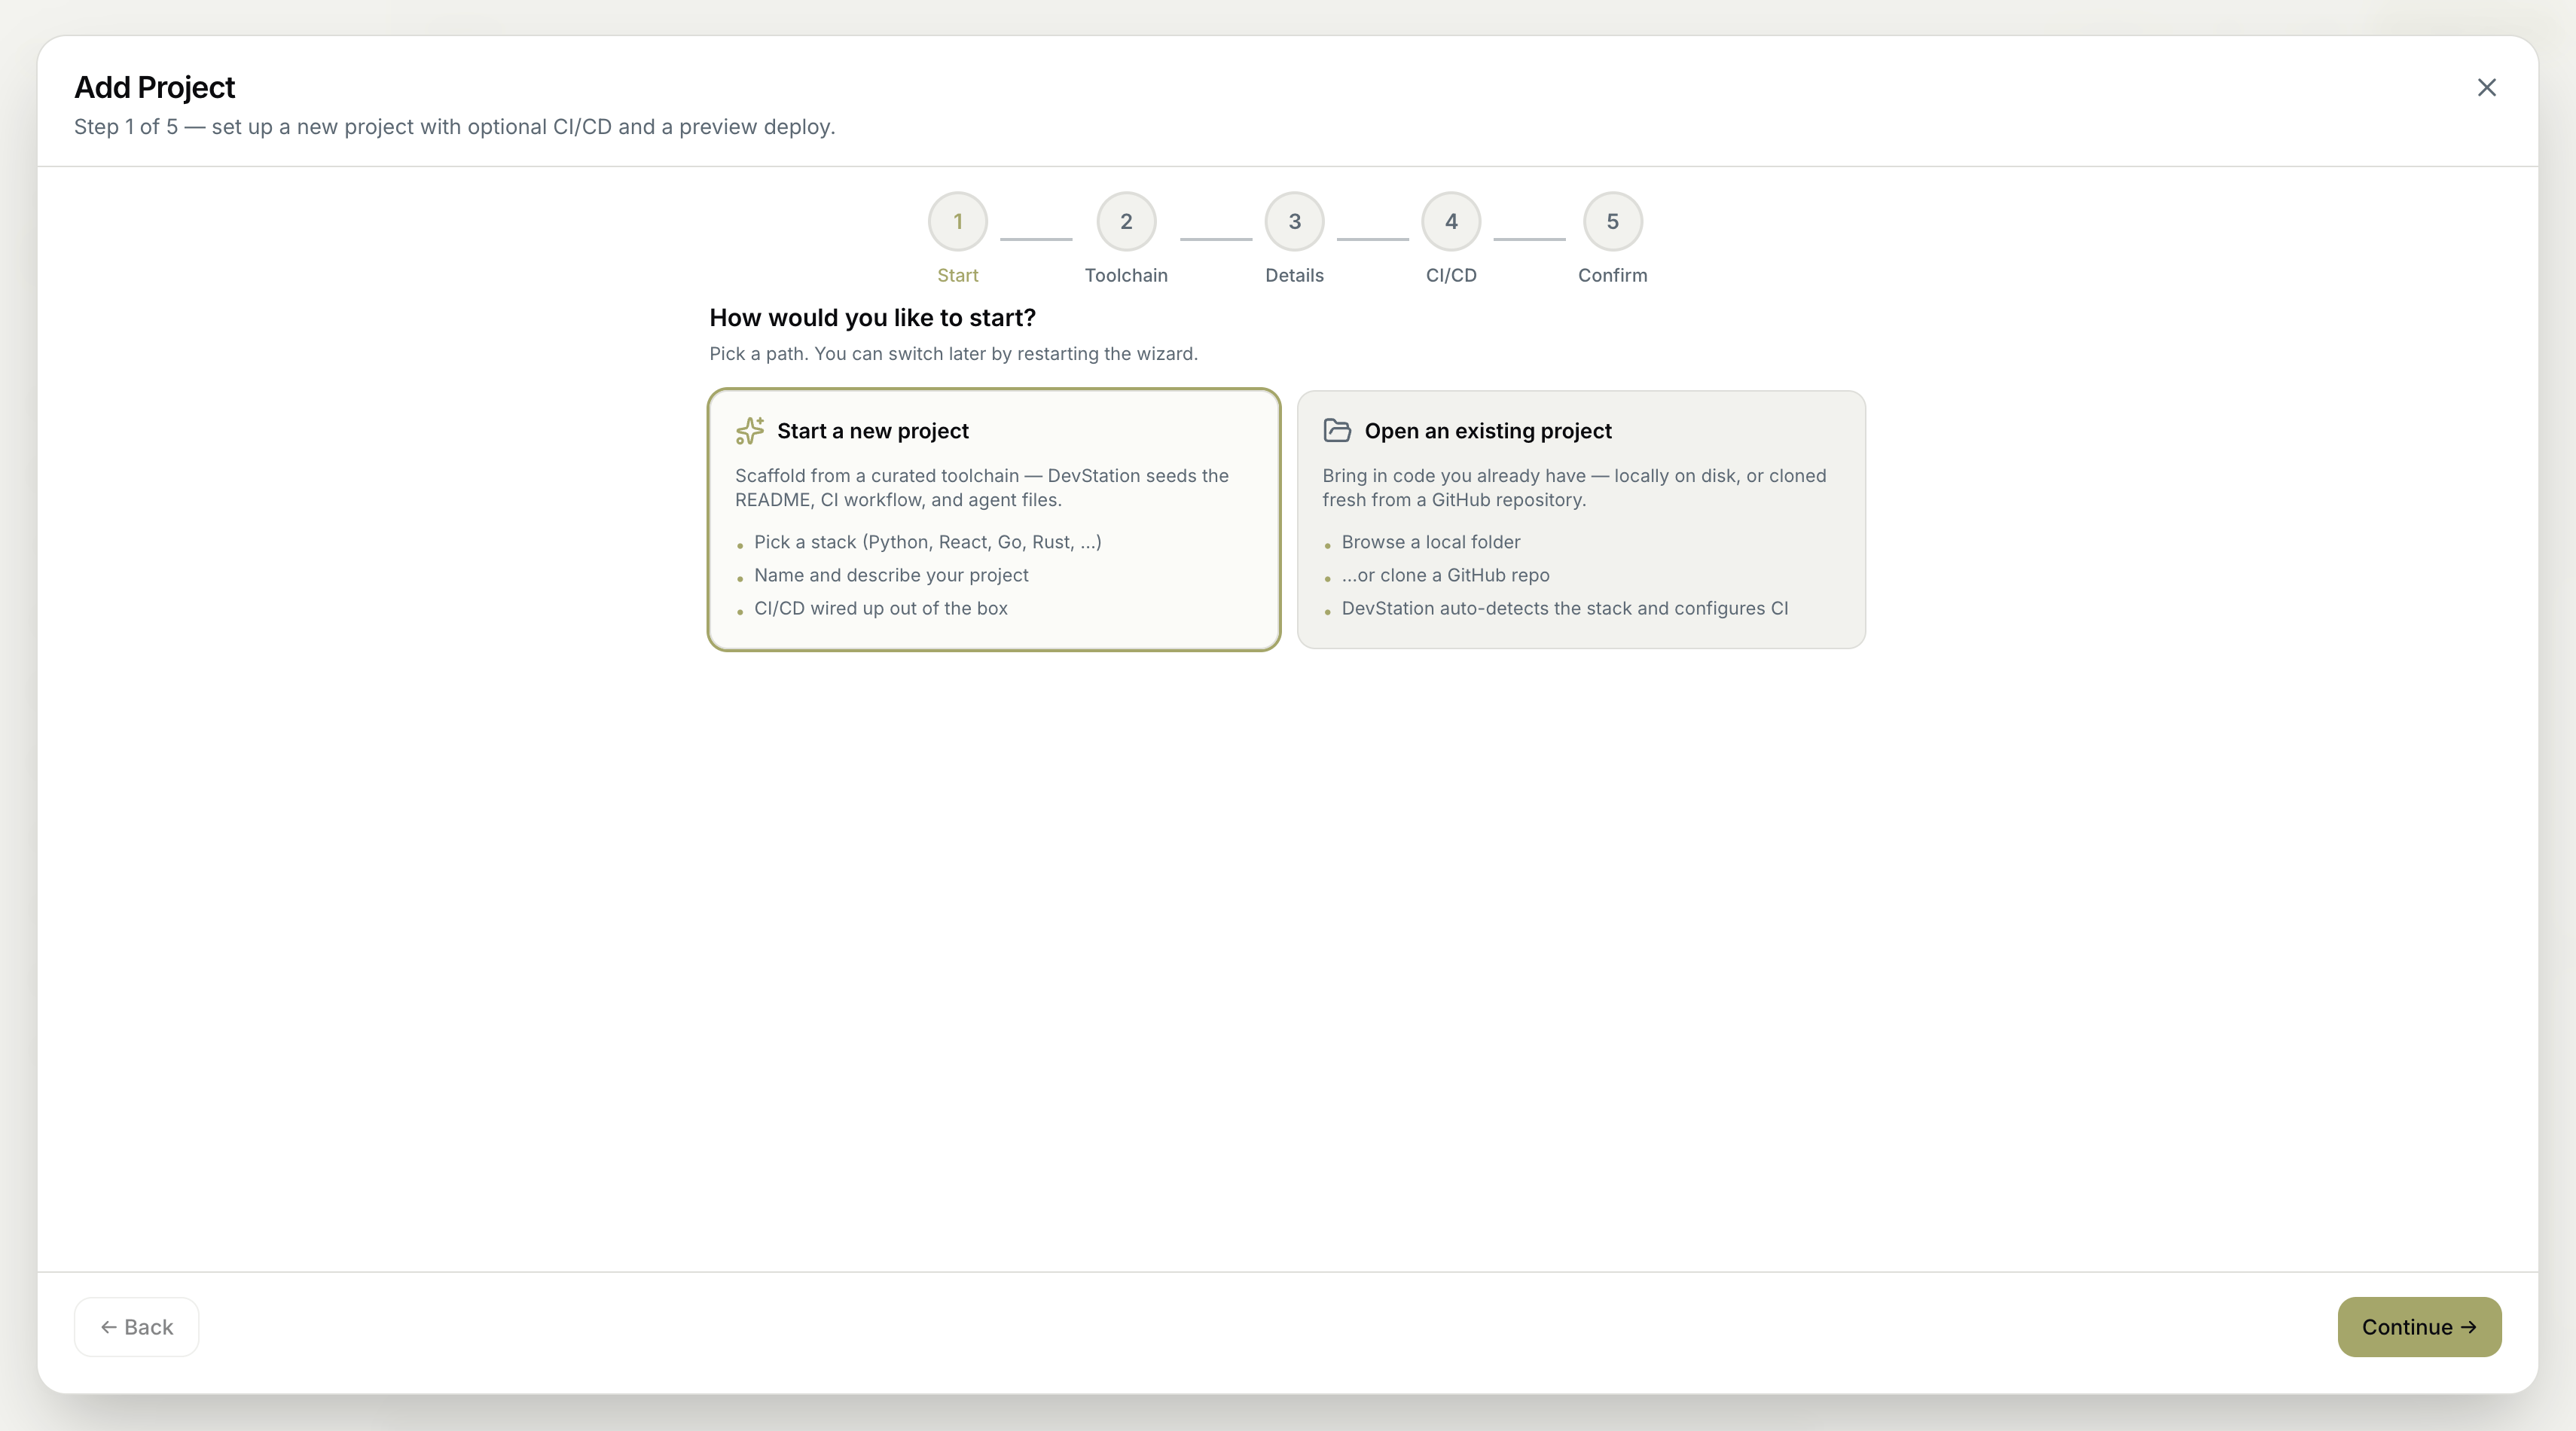
 On the wizard's first step, pick a path. You can switch later by restarting the wizard.
* **Start a new project** — scaffold from a curated toolchain; MyaiOne for Development seeds the README, CI workflow, and agent files.
* **Open an existing project** — bring in code you already have, from a local folder or cloned fresh from GitHub.
On the wizard's first step, pick a path. You can switch later by restarting the wizard.
* **Start a new project** — scaffold from a curated toolchain; MyaiOne for Development seeds the README, CI workflow, and agent files.
* **Open an existing project** — bring in code you already have, from a local folder or cloned fresh from GitHub.
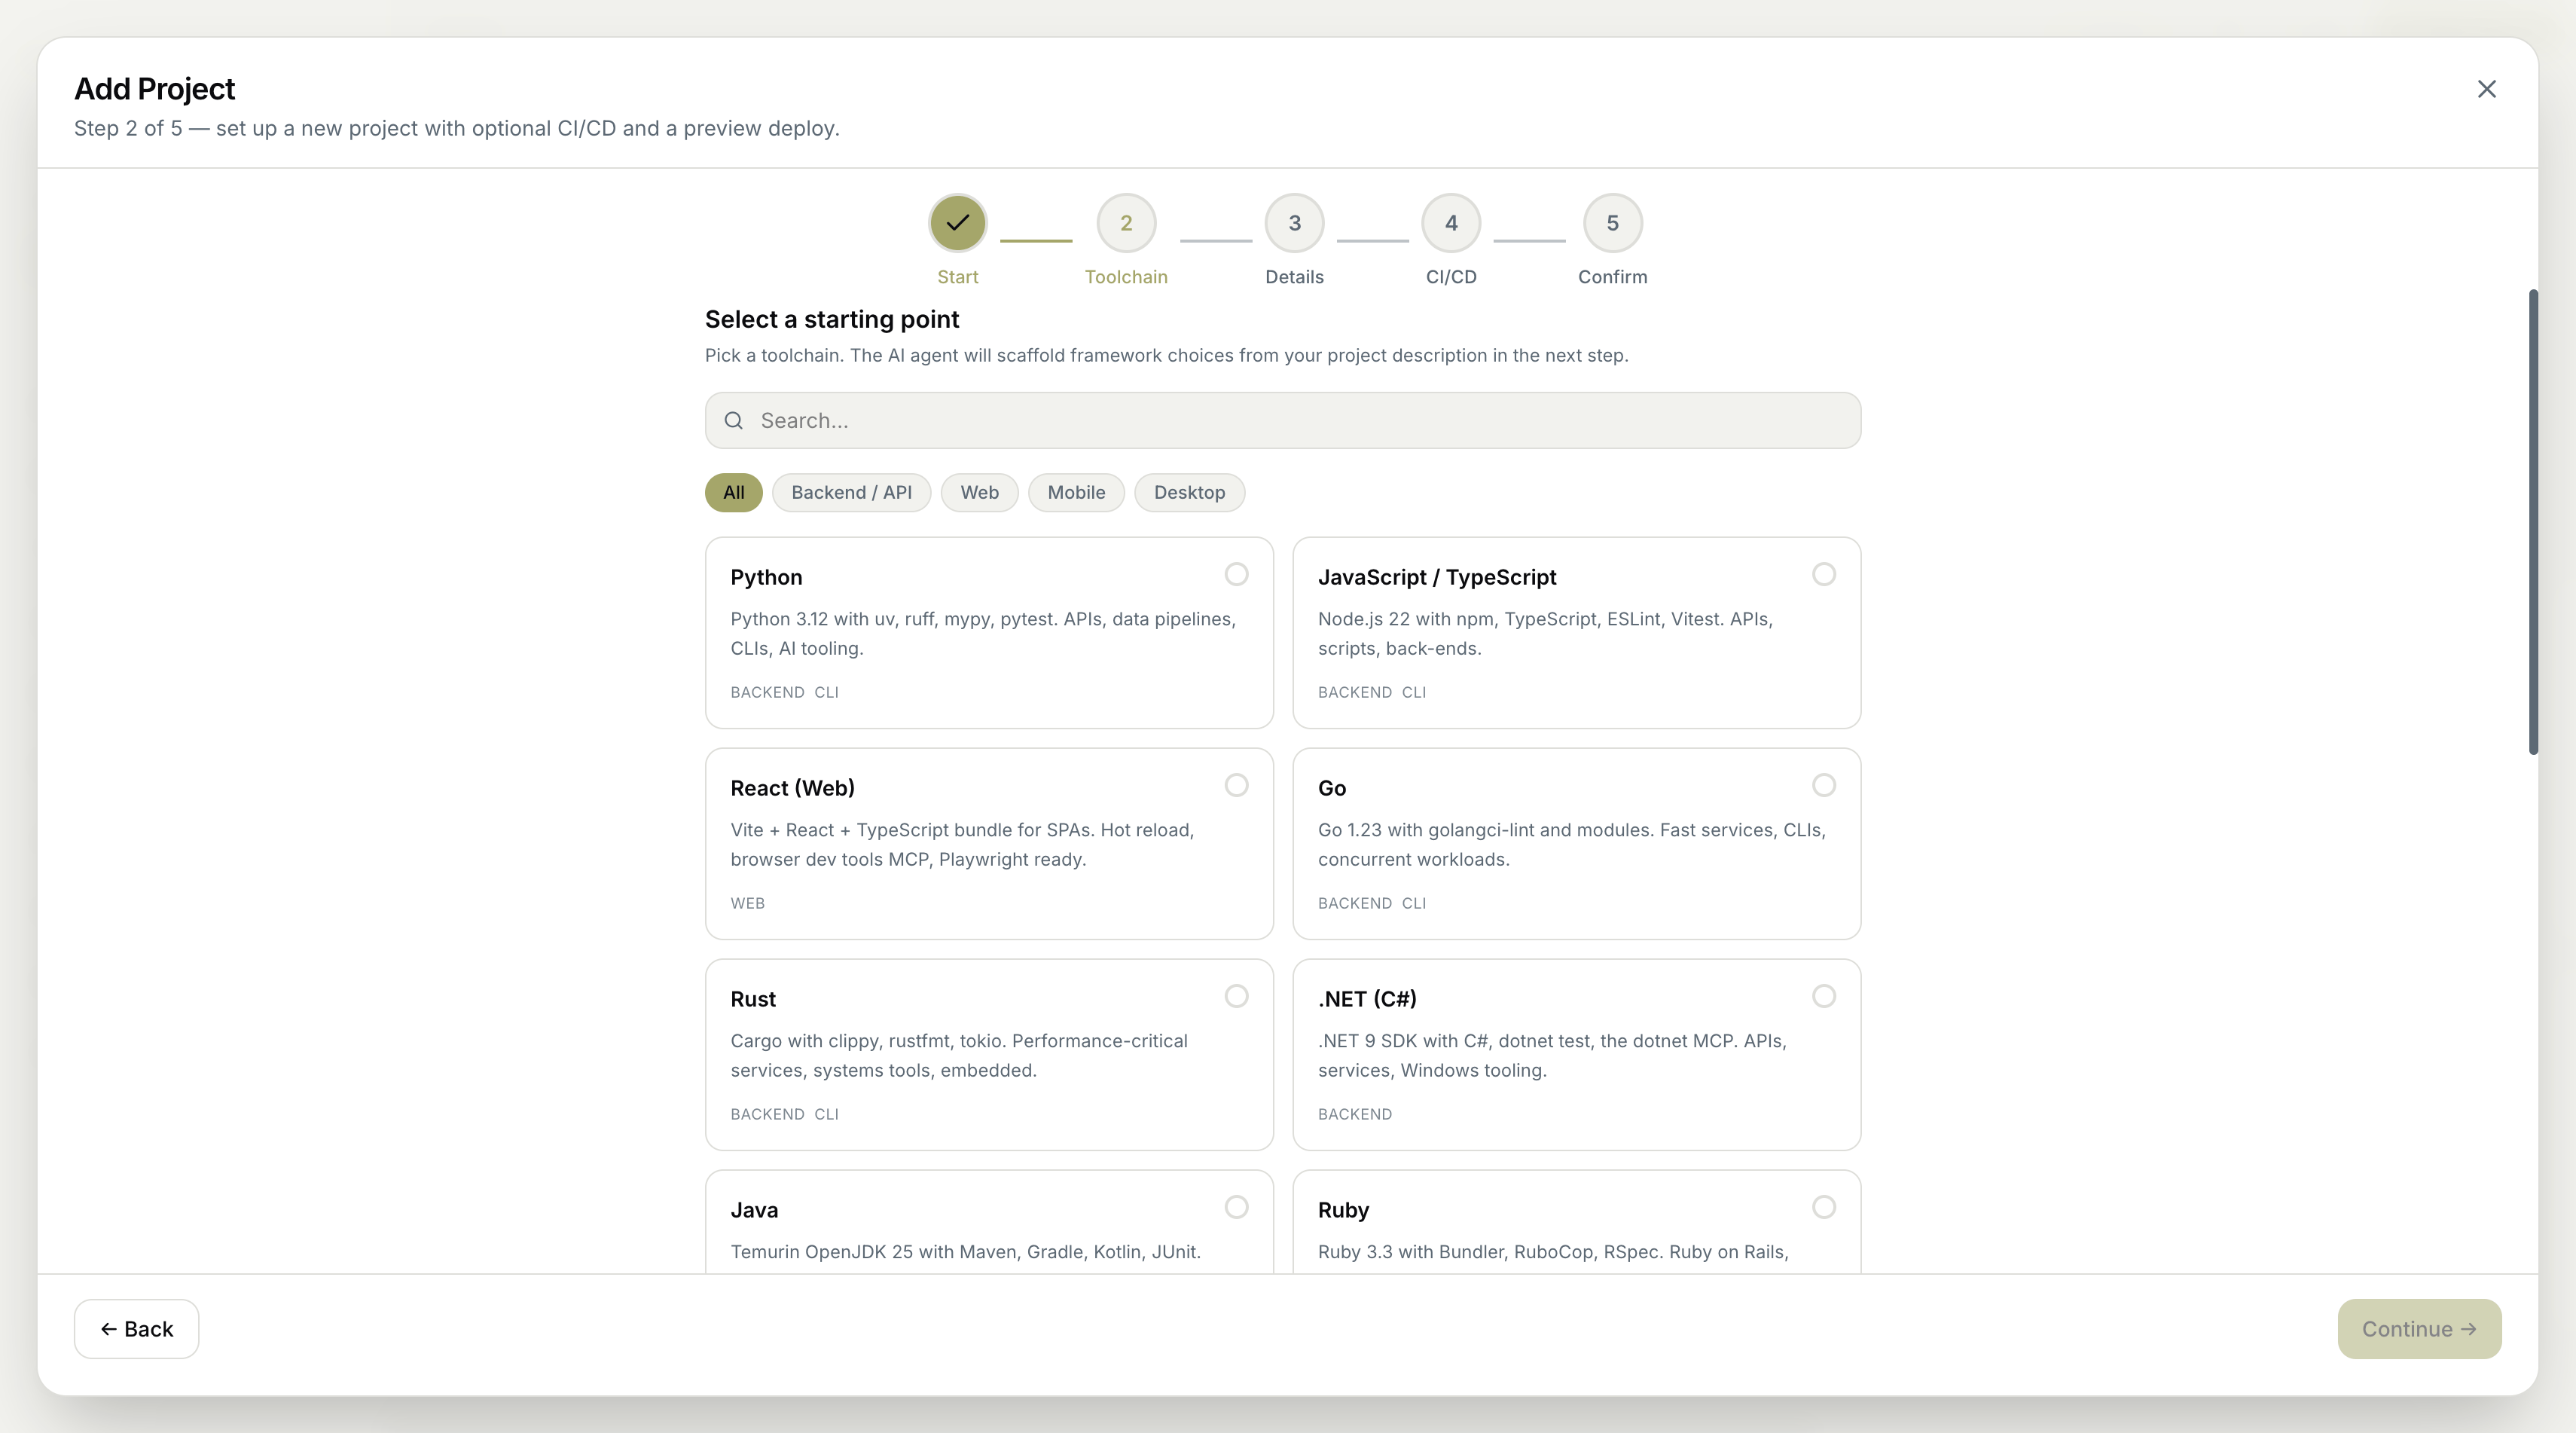
 The next three steps differ depending on which path you choose:
**Step 2 — Toolchain.** Pick a starting point. Search or filter by category (Backend / Web / Mobile / Desktop) and choose a toolchain — for example **Python** (uv, ruff, mypy, pytest), **JavaScript / TypeScript** (Node, ESLint, Vitest), **React (Web)**, **Go**, **Rust**, **.NET (C#)**, **Java**, or **Ruby**. The agent scaffolds framework choices from your project description in the next step.
The next three steps differ depending on which path you choose:
**Step 2 — Toolchain.** Pick a starting point. Search or filter by category (Backend / Web / Mobile / Desktop) and choose a toolchain — for example **Python** (uv, ruff, mypy, pytest), **JavaScript / TypeScript** (Node, ESLint, Vitest), **React (Web)**, **Go**, **Rust**, **.NET (C#)**, **Java**, or **Ruby**. The agent scaffolds framework choices from your project description in the next step.
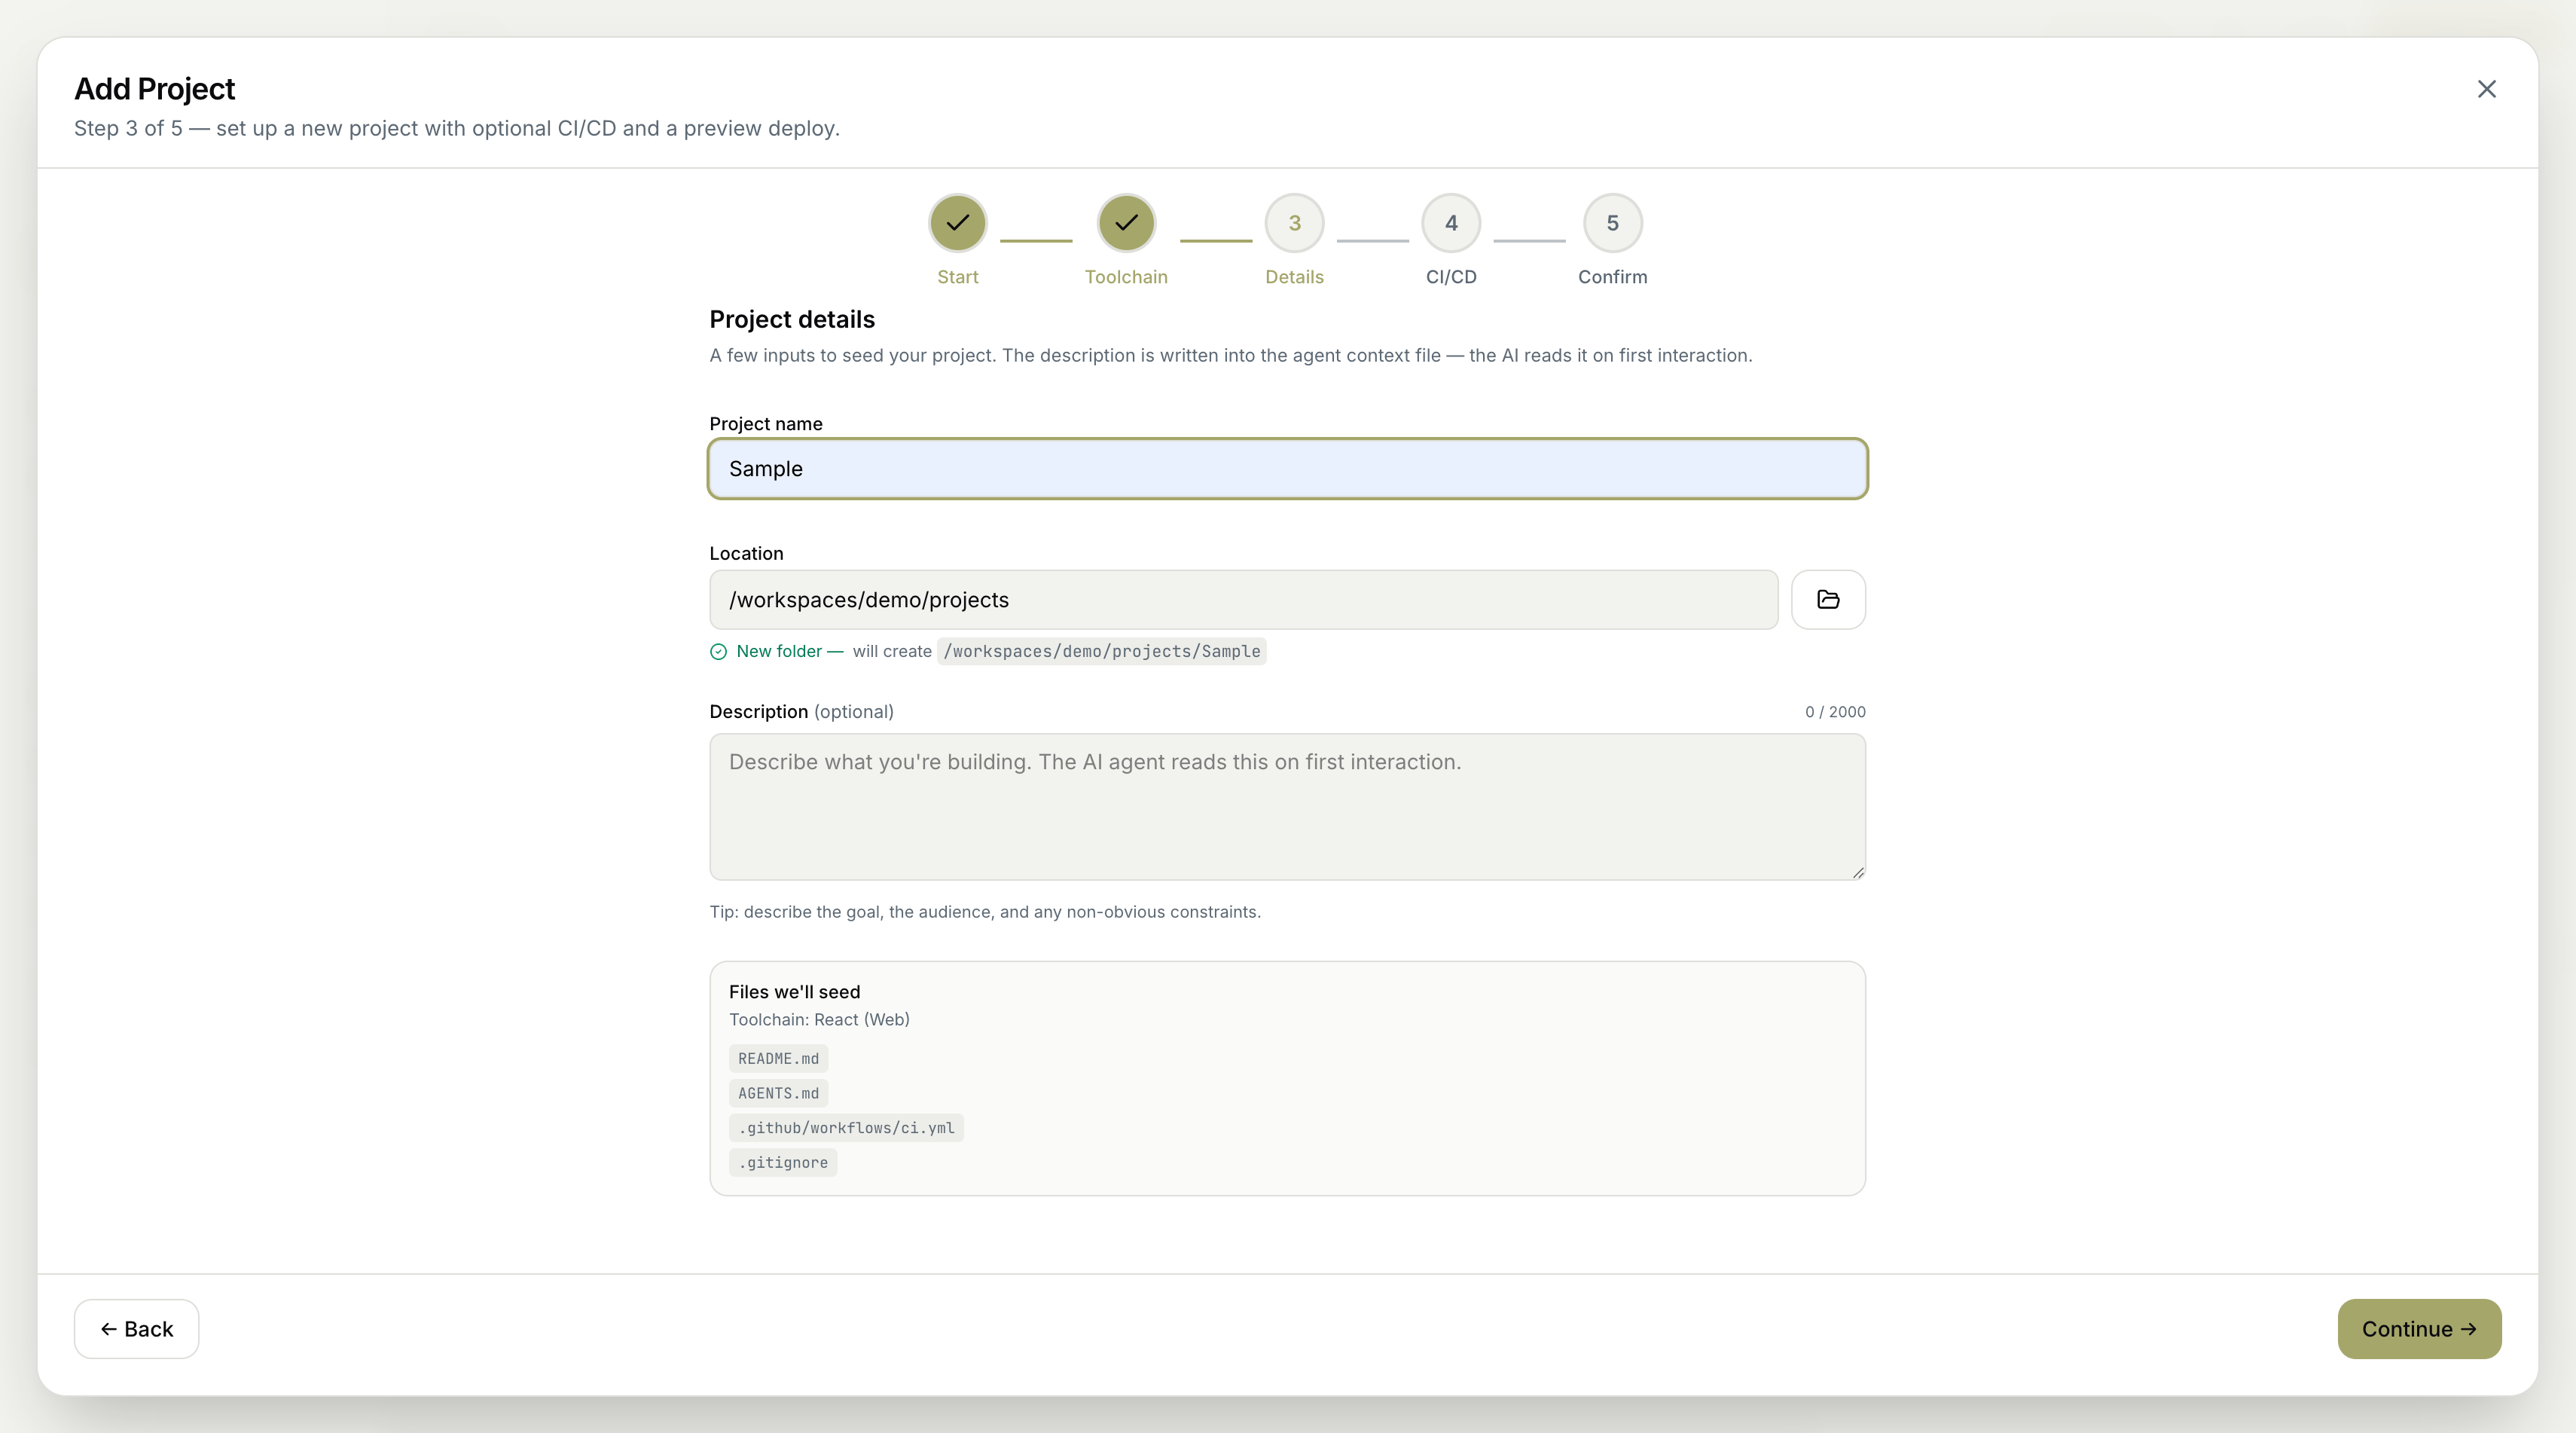
 **Step 3 — Details.** Give the project a **name**, confirm its **location**, and add an optional **description**. The description is written into the agent context file (`AGENTS.md`) and read by the AI on first interaction, so describe the goal, the audience, and any non-obvious constraints. A "Files we'll seed" panel previews what gets created (`README.md`, `AGENTS.md`, `.github/workflows/ci.yml`, `.gitignore`).
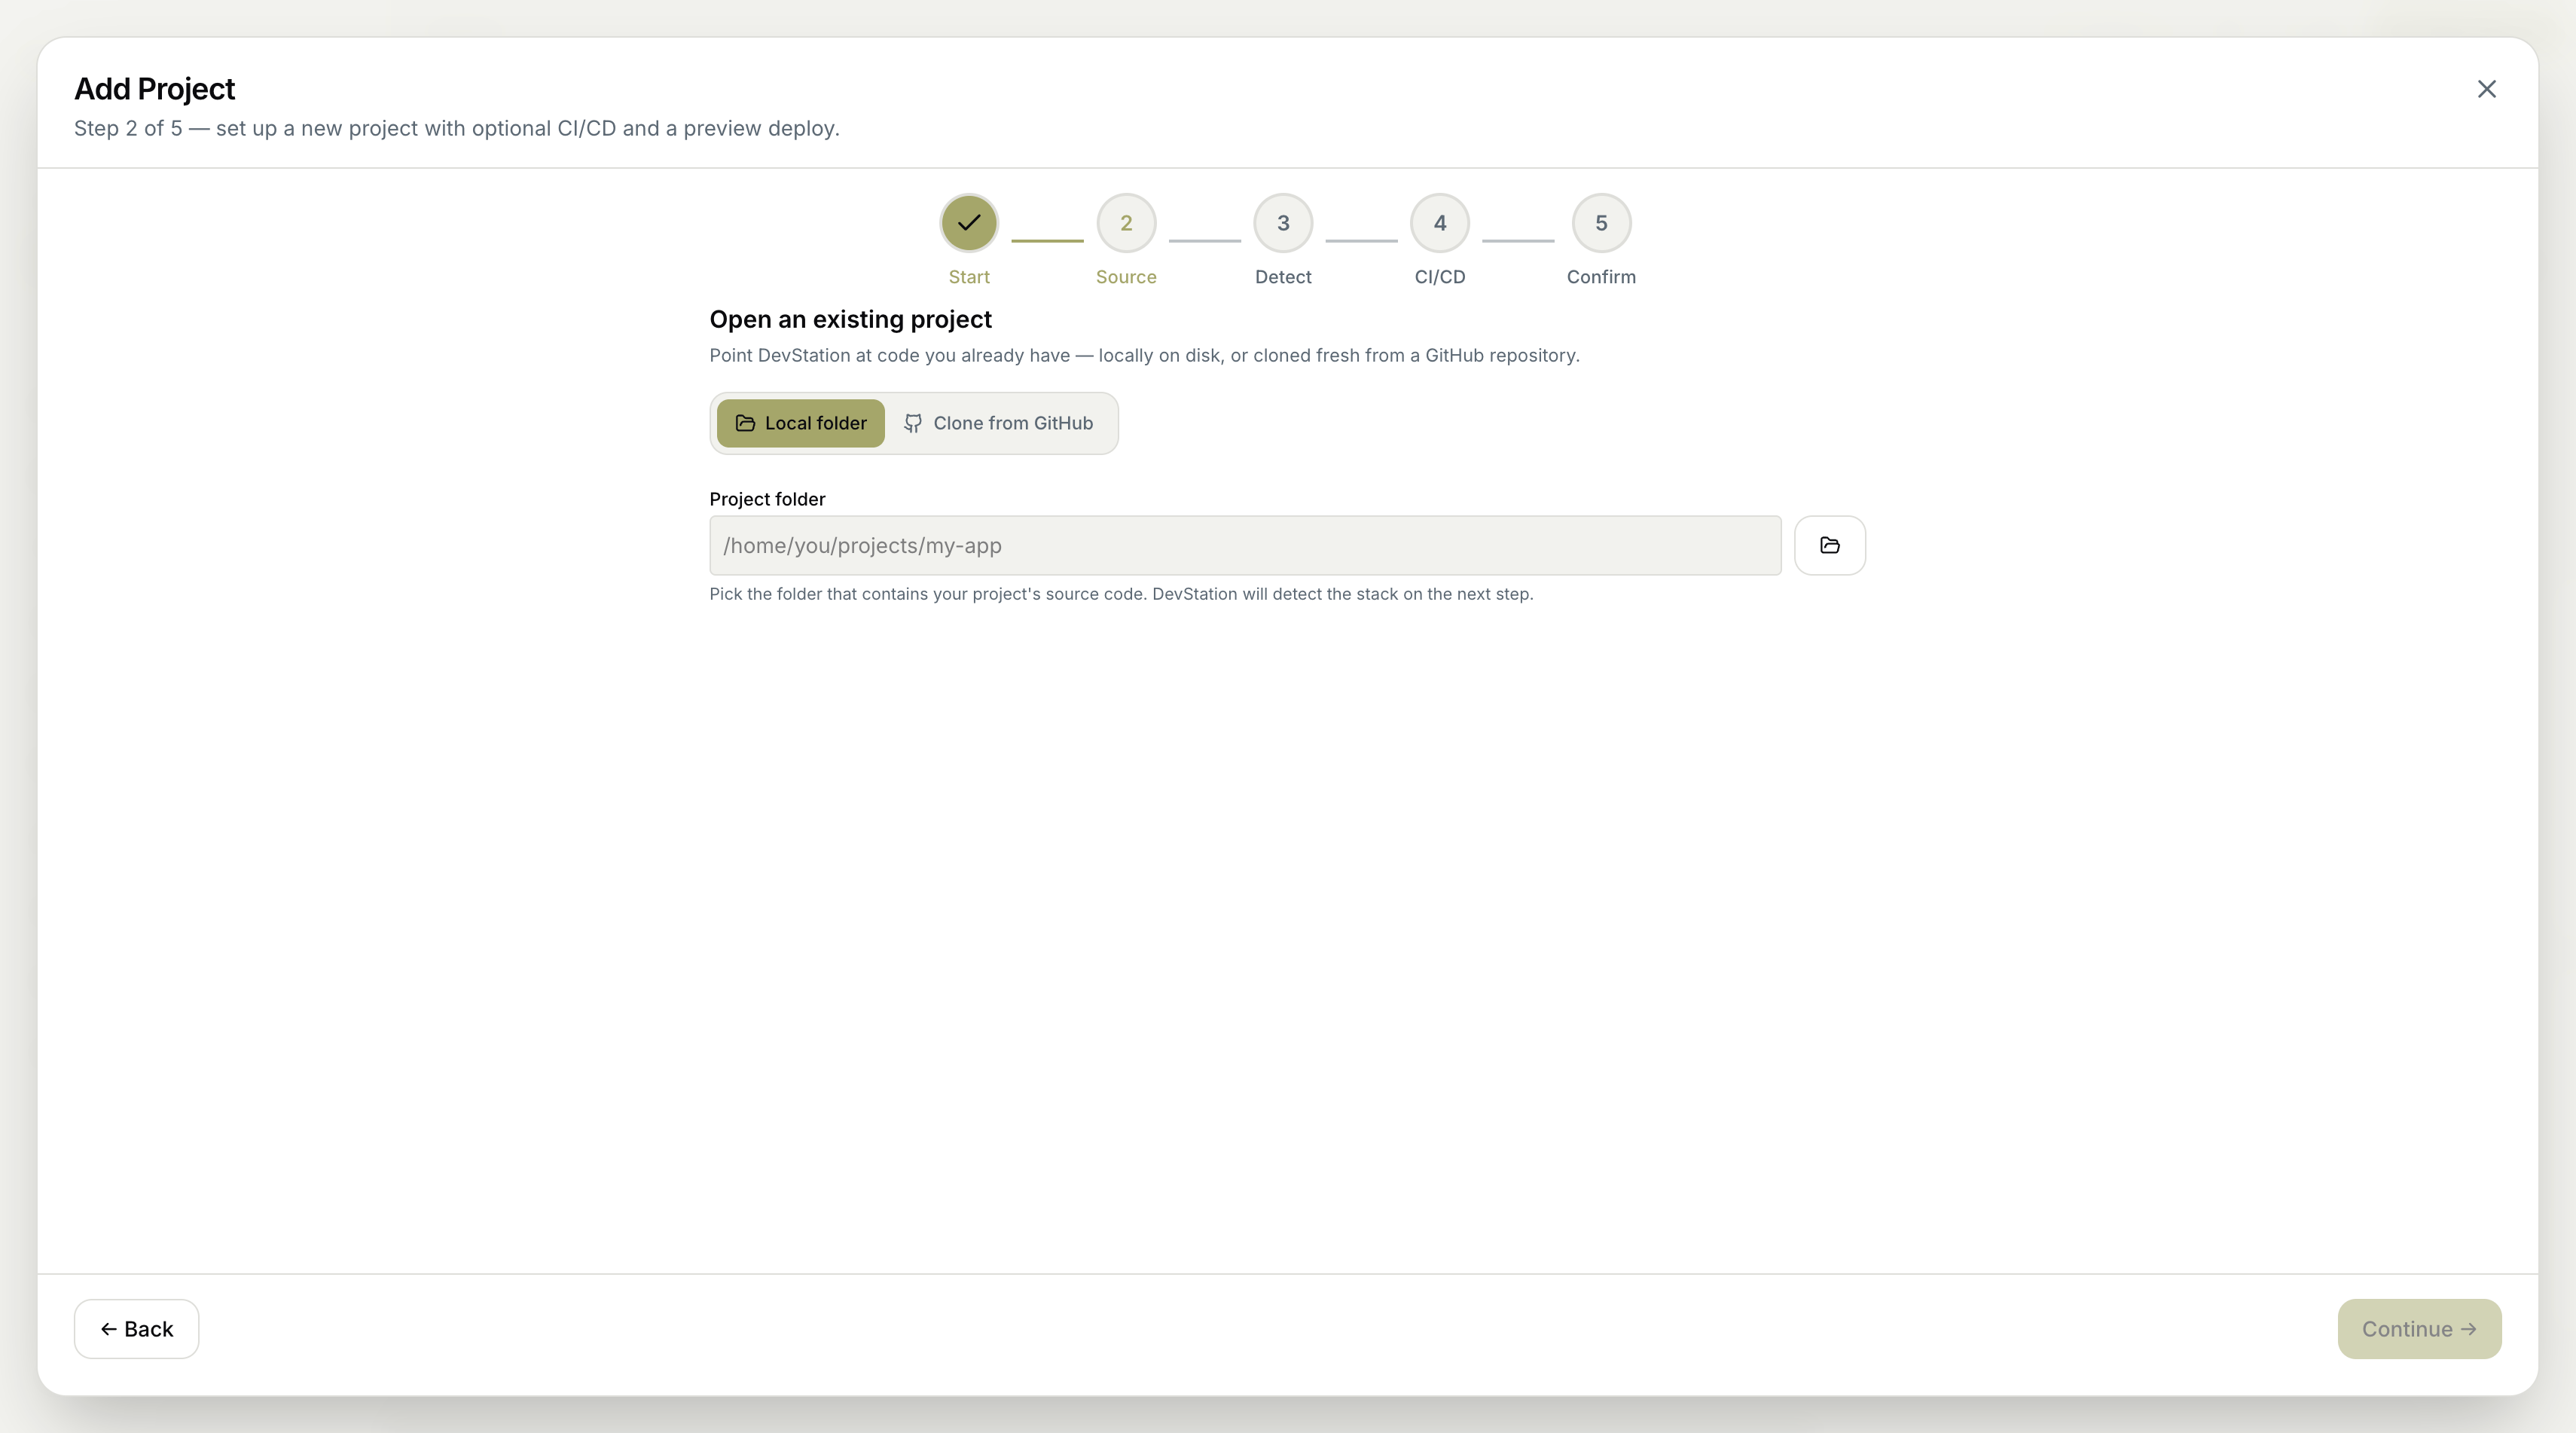
 **Step 2 — Source.** Point MyaiOne for Development at your code. Choose **Local folder** and pick the folder containing your source, or **Clone from GitHub** — filter by account or paste a **Custom URL**, search your repos, and set the destination folder where the repo lands, then **Clone & Detect**.
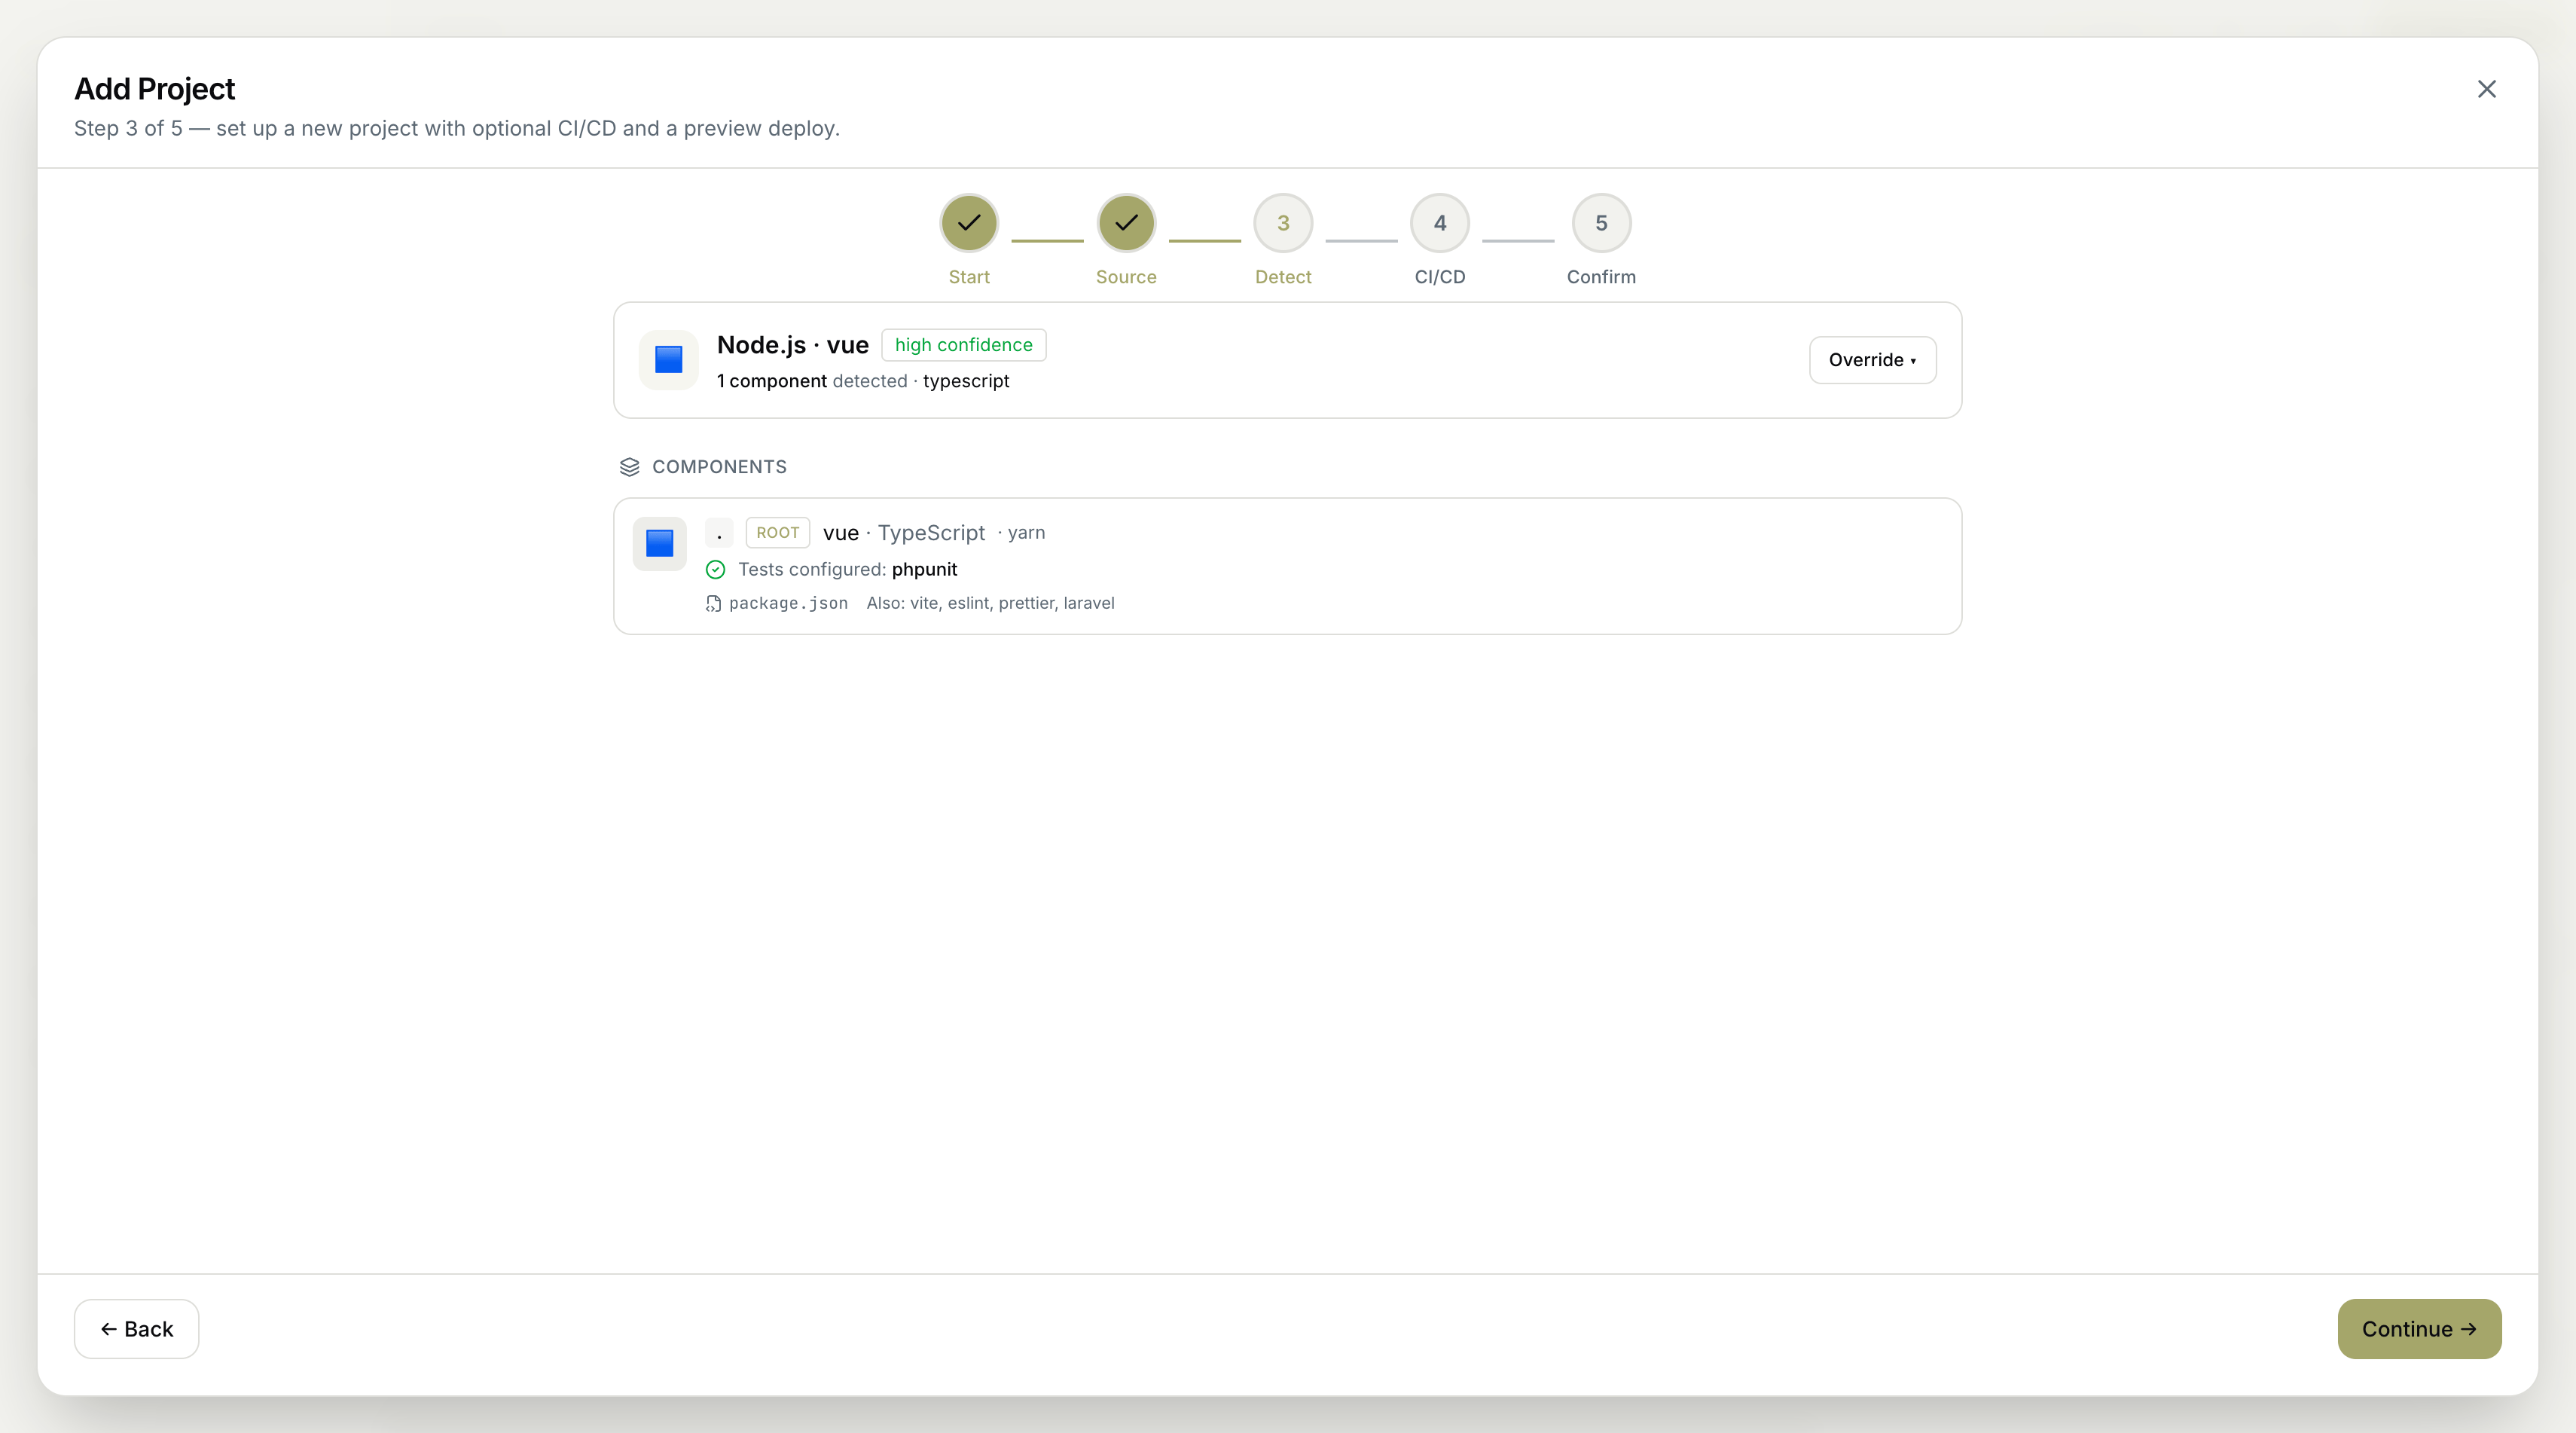
 **Step 3 — Detect.** MyaiOne for Development auto-detects your stack and shows it with a confidence level. If the guess is off, use **Override** to set the language or framework manually (Python, JavaScript / TypeScript, React, Go, Rust, .NET, Java, Ruby, PHP, …).
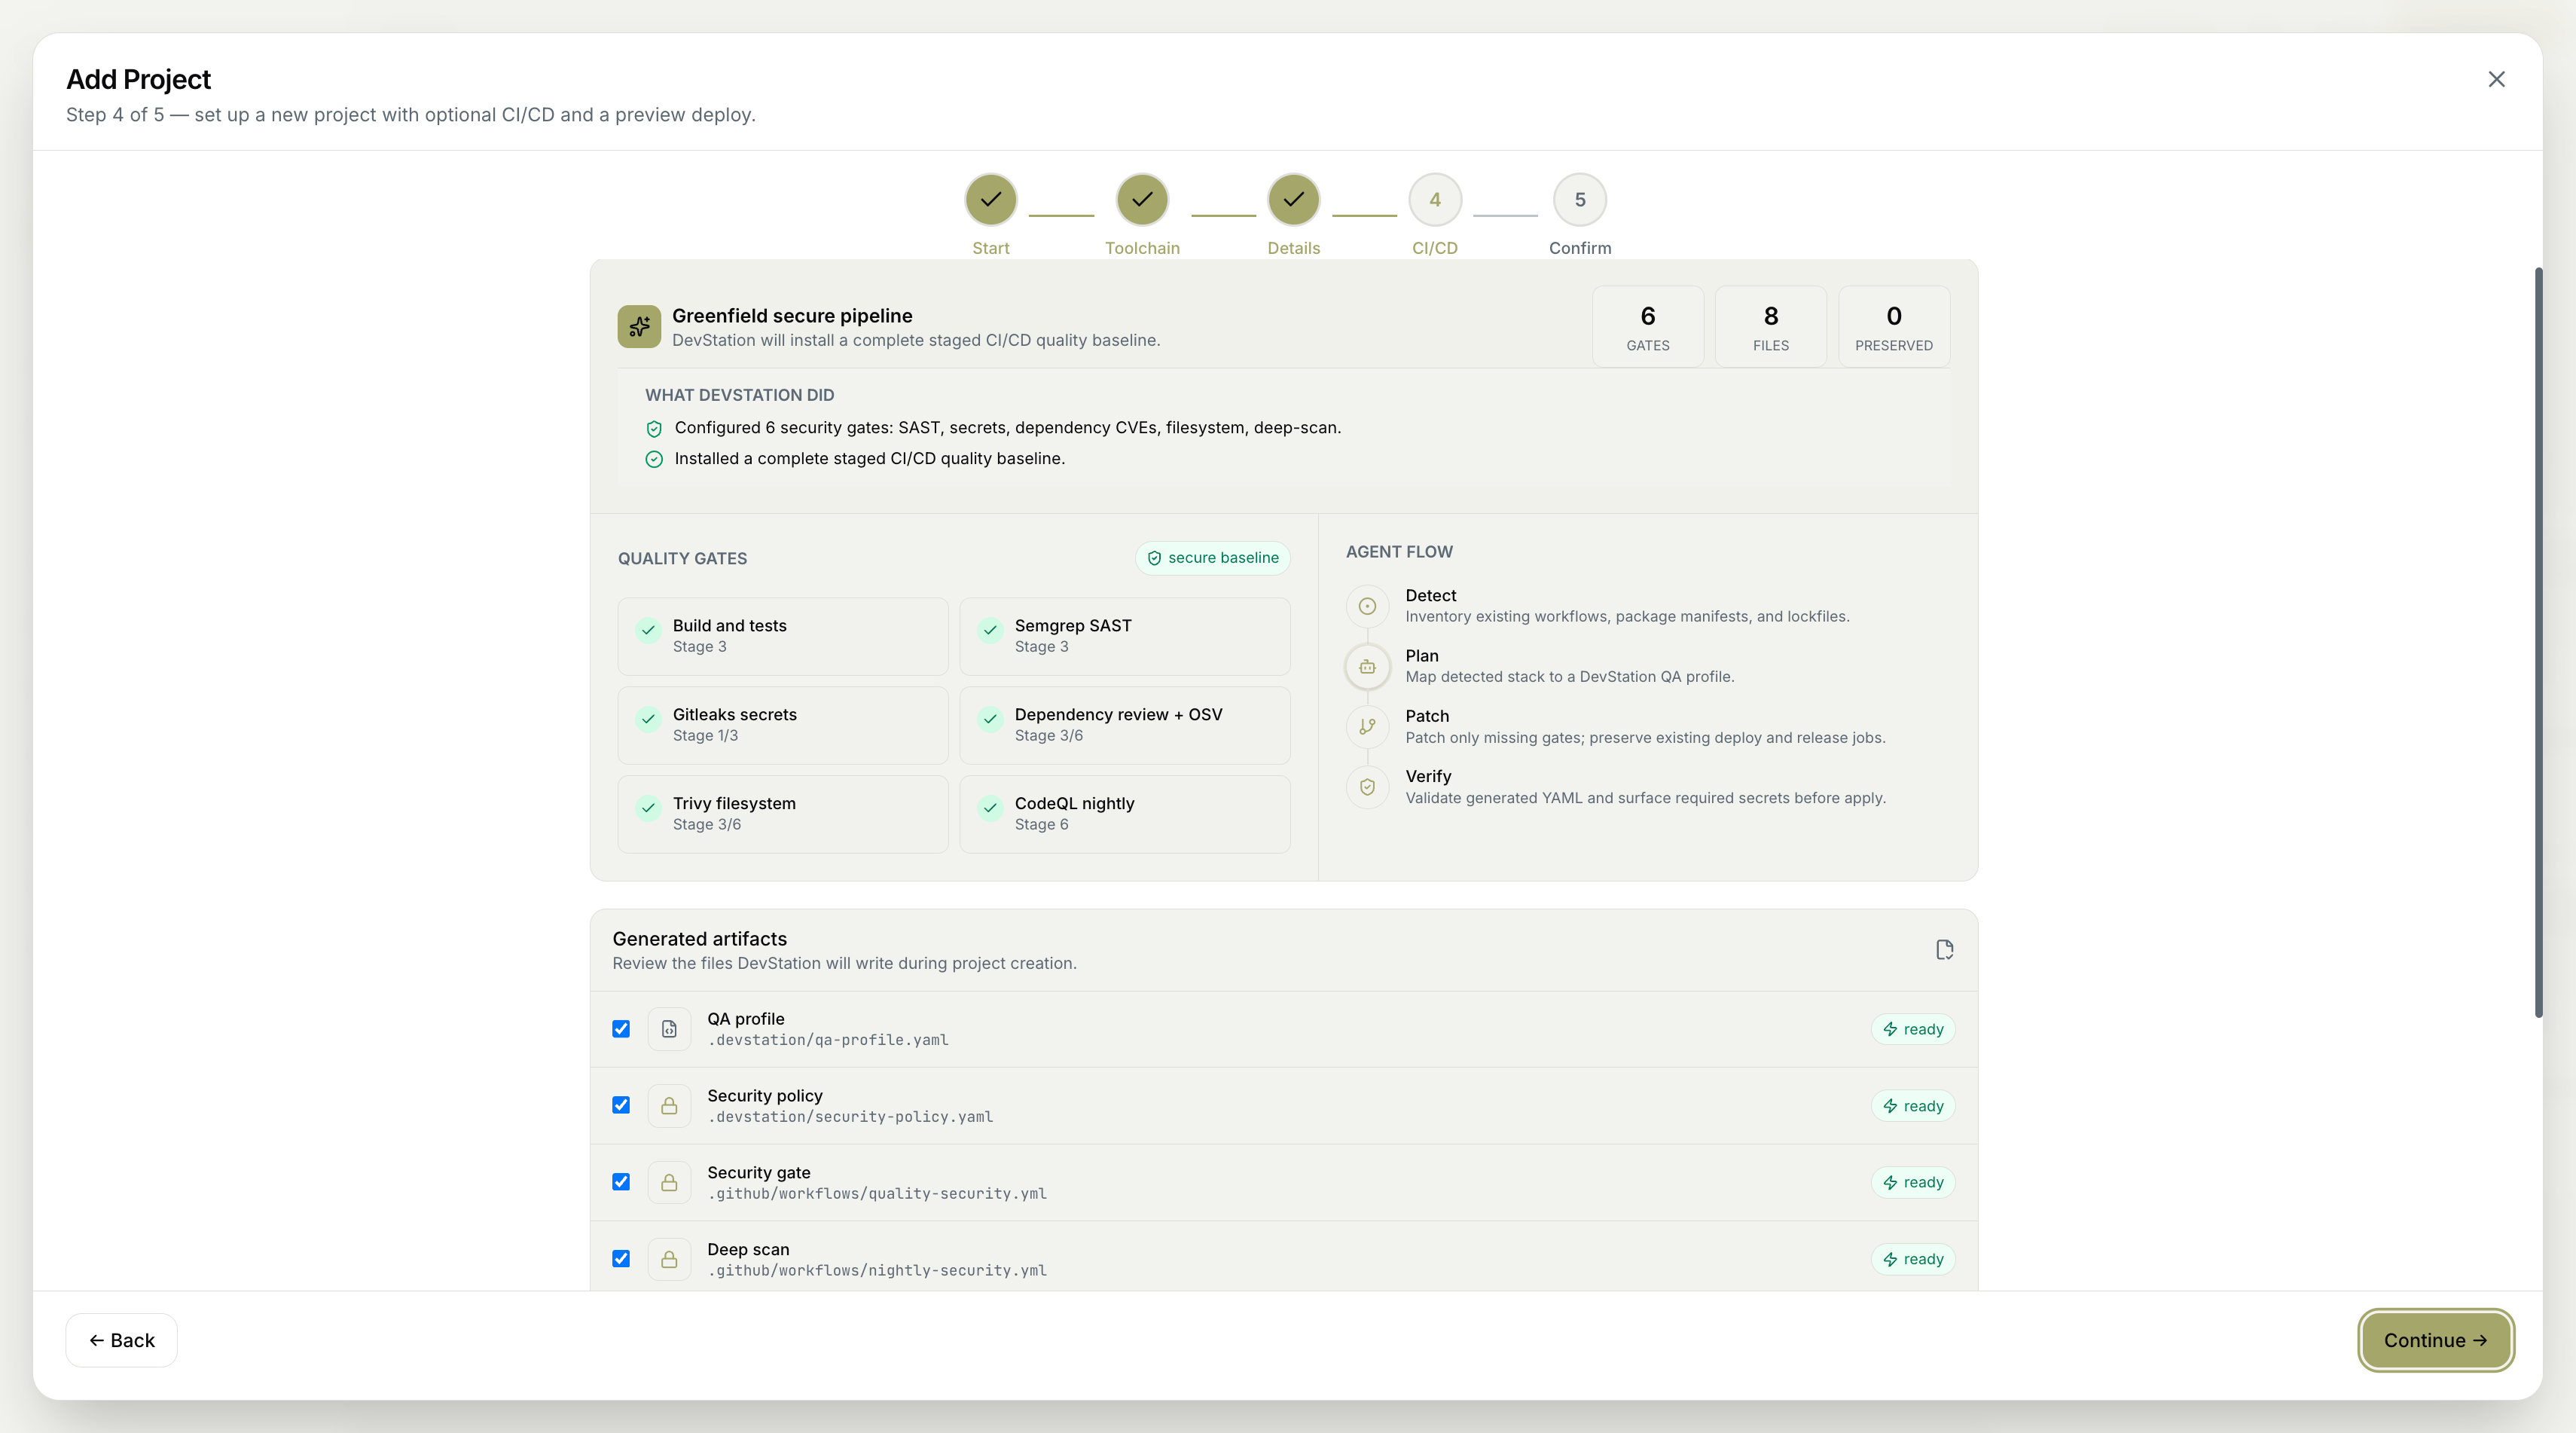
 On the **CI/CD** step, MyaiOne for Development installs a complete staged CI/CD quality baseline and shows what it configured — security gates (SAST, secrets, dependency CVEs, filesystem, deep-scan), the quality gates it set up (Build and tests, Semgrep SAST, Gitleaks secrets, Dependency review + OSV, Trivy filesystem, CodeQL nightly), and the agent flow (**Detect → Plan → Patch → Verify**). For existing projects, your current files are preserved and new artifacts are staged for safe apply.
 The final **Confirm** step shows a project summary, an `AGENTS.md` preview, and **Test Center — preview & build defaults**, where you can set the **build strategy** (Auto, Nixpacks, Dockerfile, or Compose) or skip and configure it later. When you're ready, click **Create Project**.
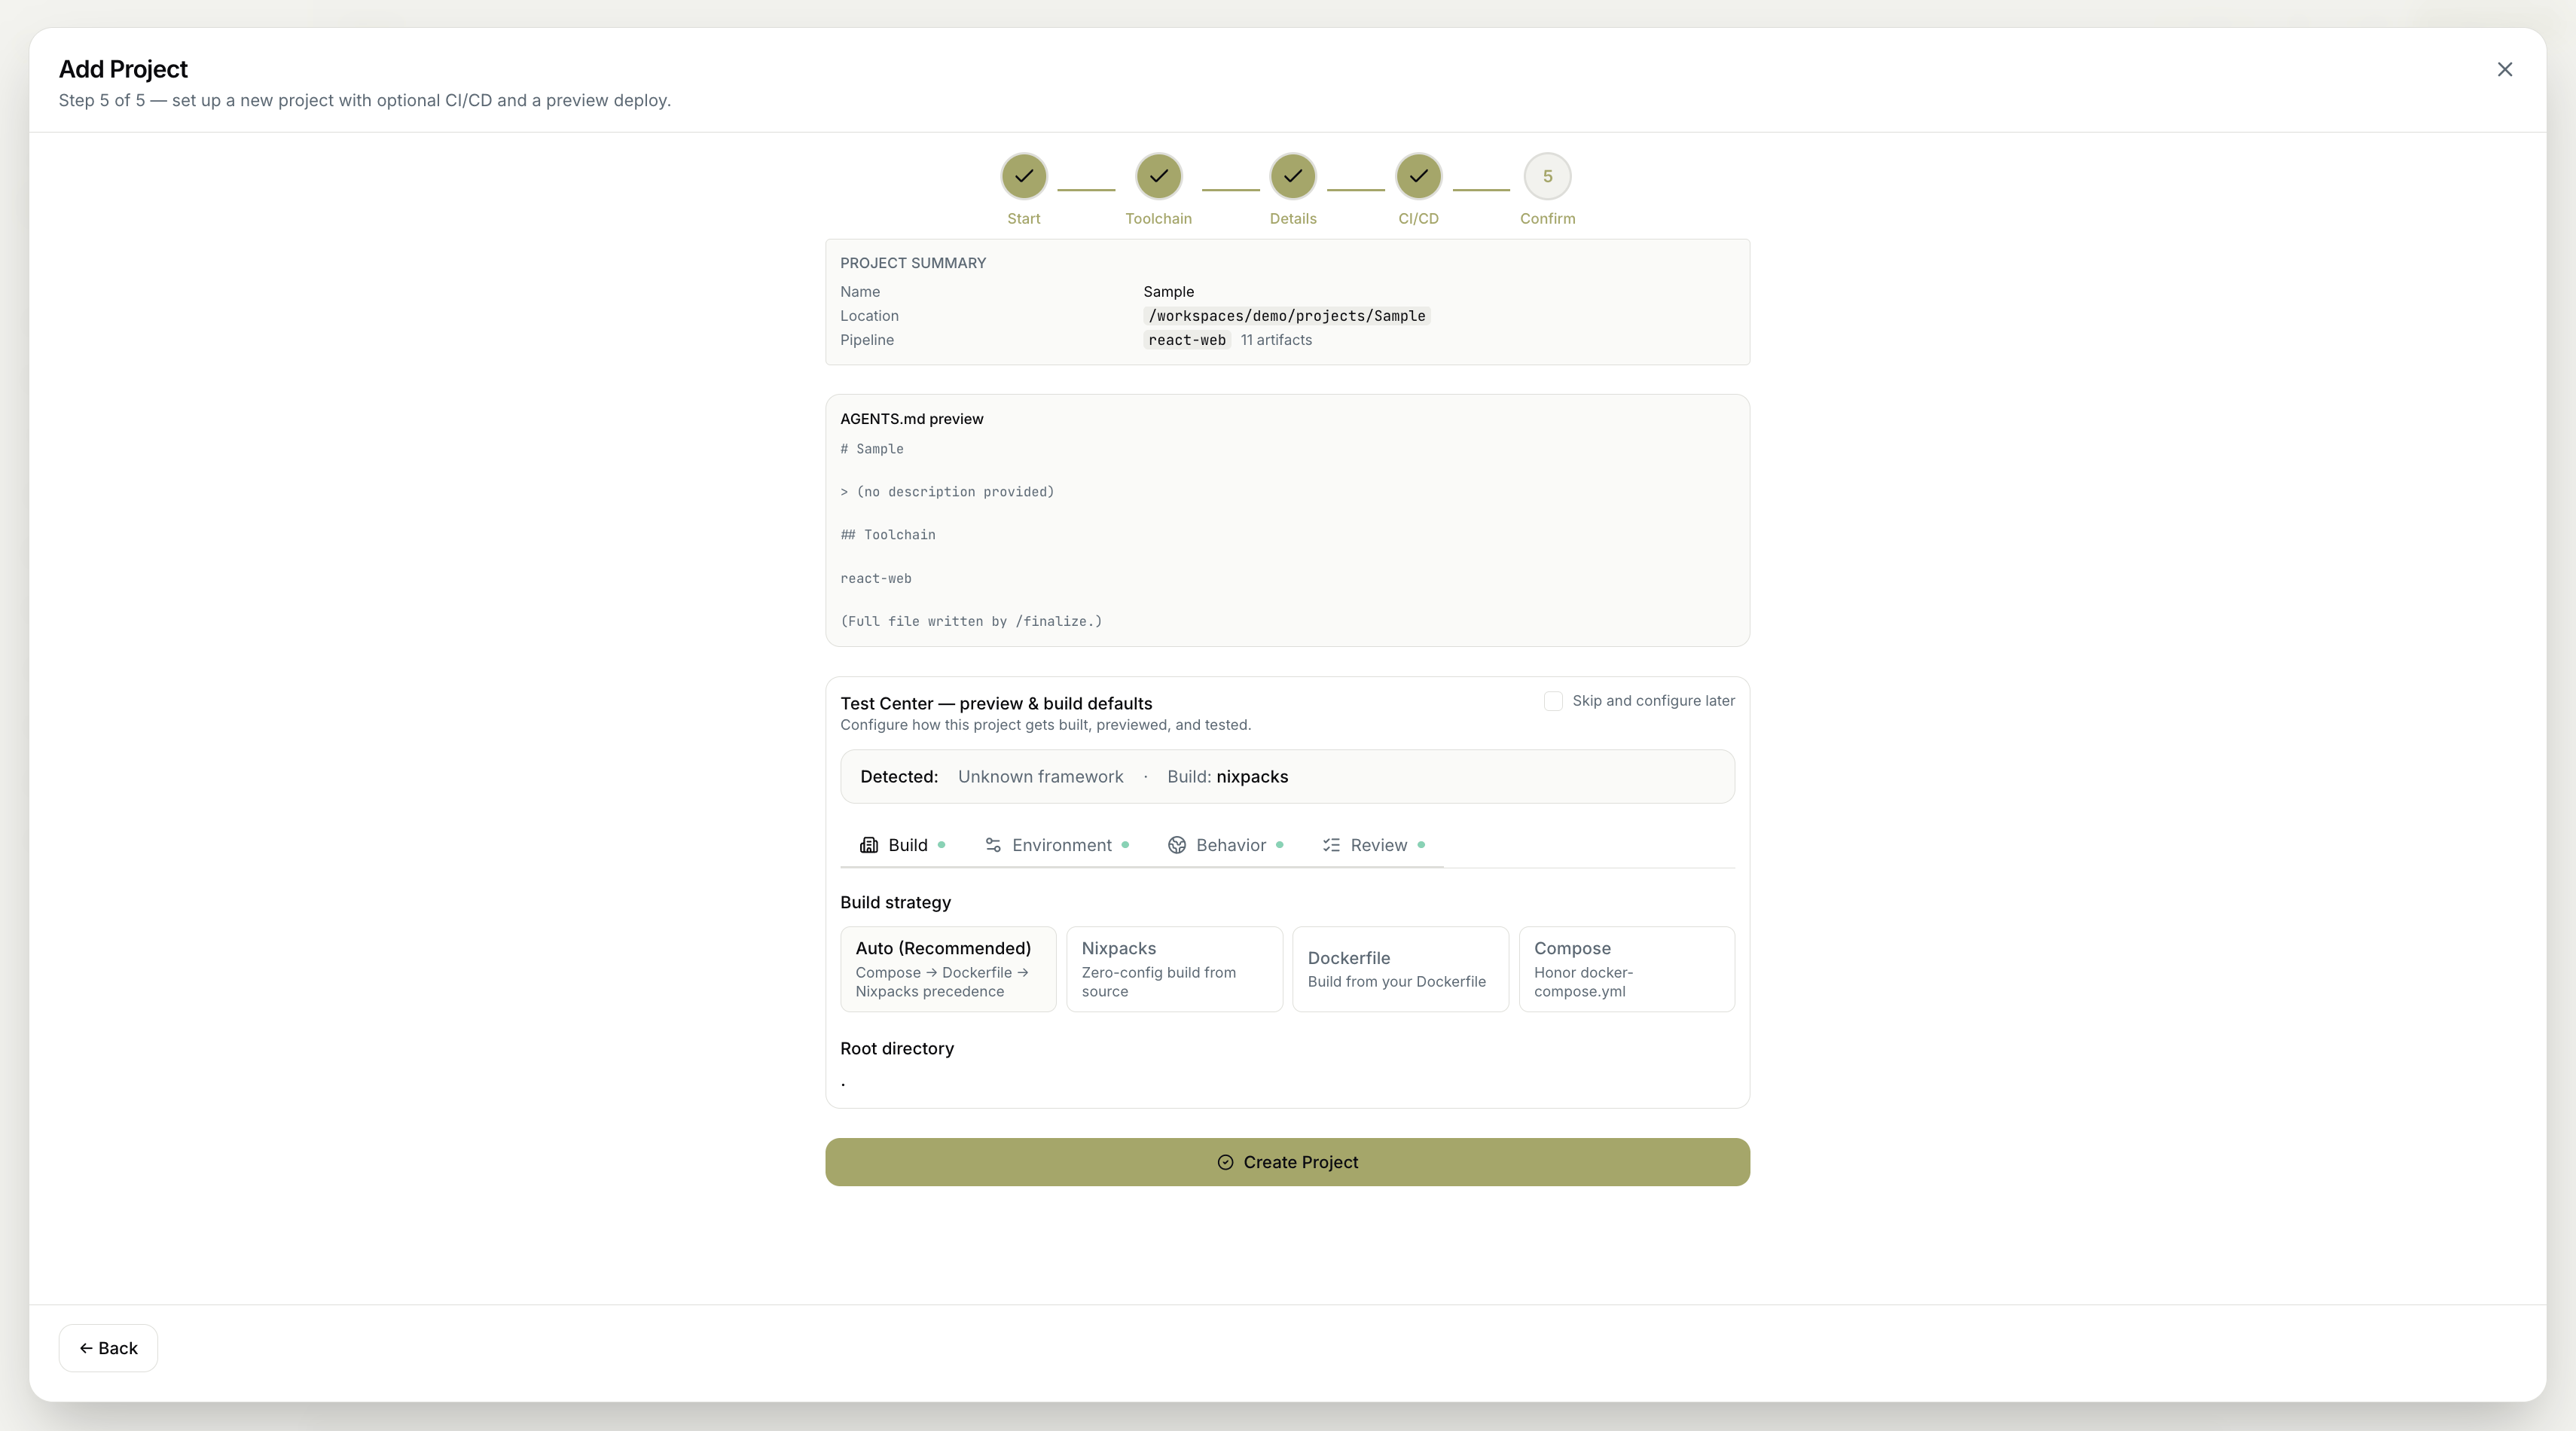 Not sure about the build settings? Leave **Auto (Recommended)** selected, or tick **Skip and configure later** — you can adjust everything from Test Center after the project is created.
MyaiOne for Development creates the project and drops you on the **Dashboard** — live project health and queue insights. You'll see status cards (Tasks Completed, Tasks in Queue, GitHub Issues, Latest Test Run, Agents Running, System Utilization) and the kanban board (Planning → Queue → In Progress → AI Review → Human Review → Done), empty and ready for your first task.
Not sure about the build settings? Leave **Auto (Recommended)** selected, or tick **Skip and configure later** — you can adjust everything from Test Center after the project is created.
MyaiOne for Development creates the project and drops you on the **Dashboard** — live project health and queue insights. You'll see status cards (Tasks Completed, Tasks in Queue, GitHub Issues, Latest Test Run, Agents Running, System Utilization) and the kanban board (Planning → Queue → In Progress → AI Review → Human Review → Done), empty and ready for your first task.
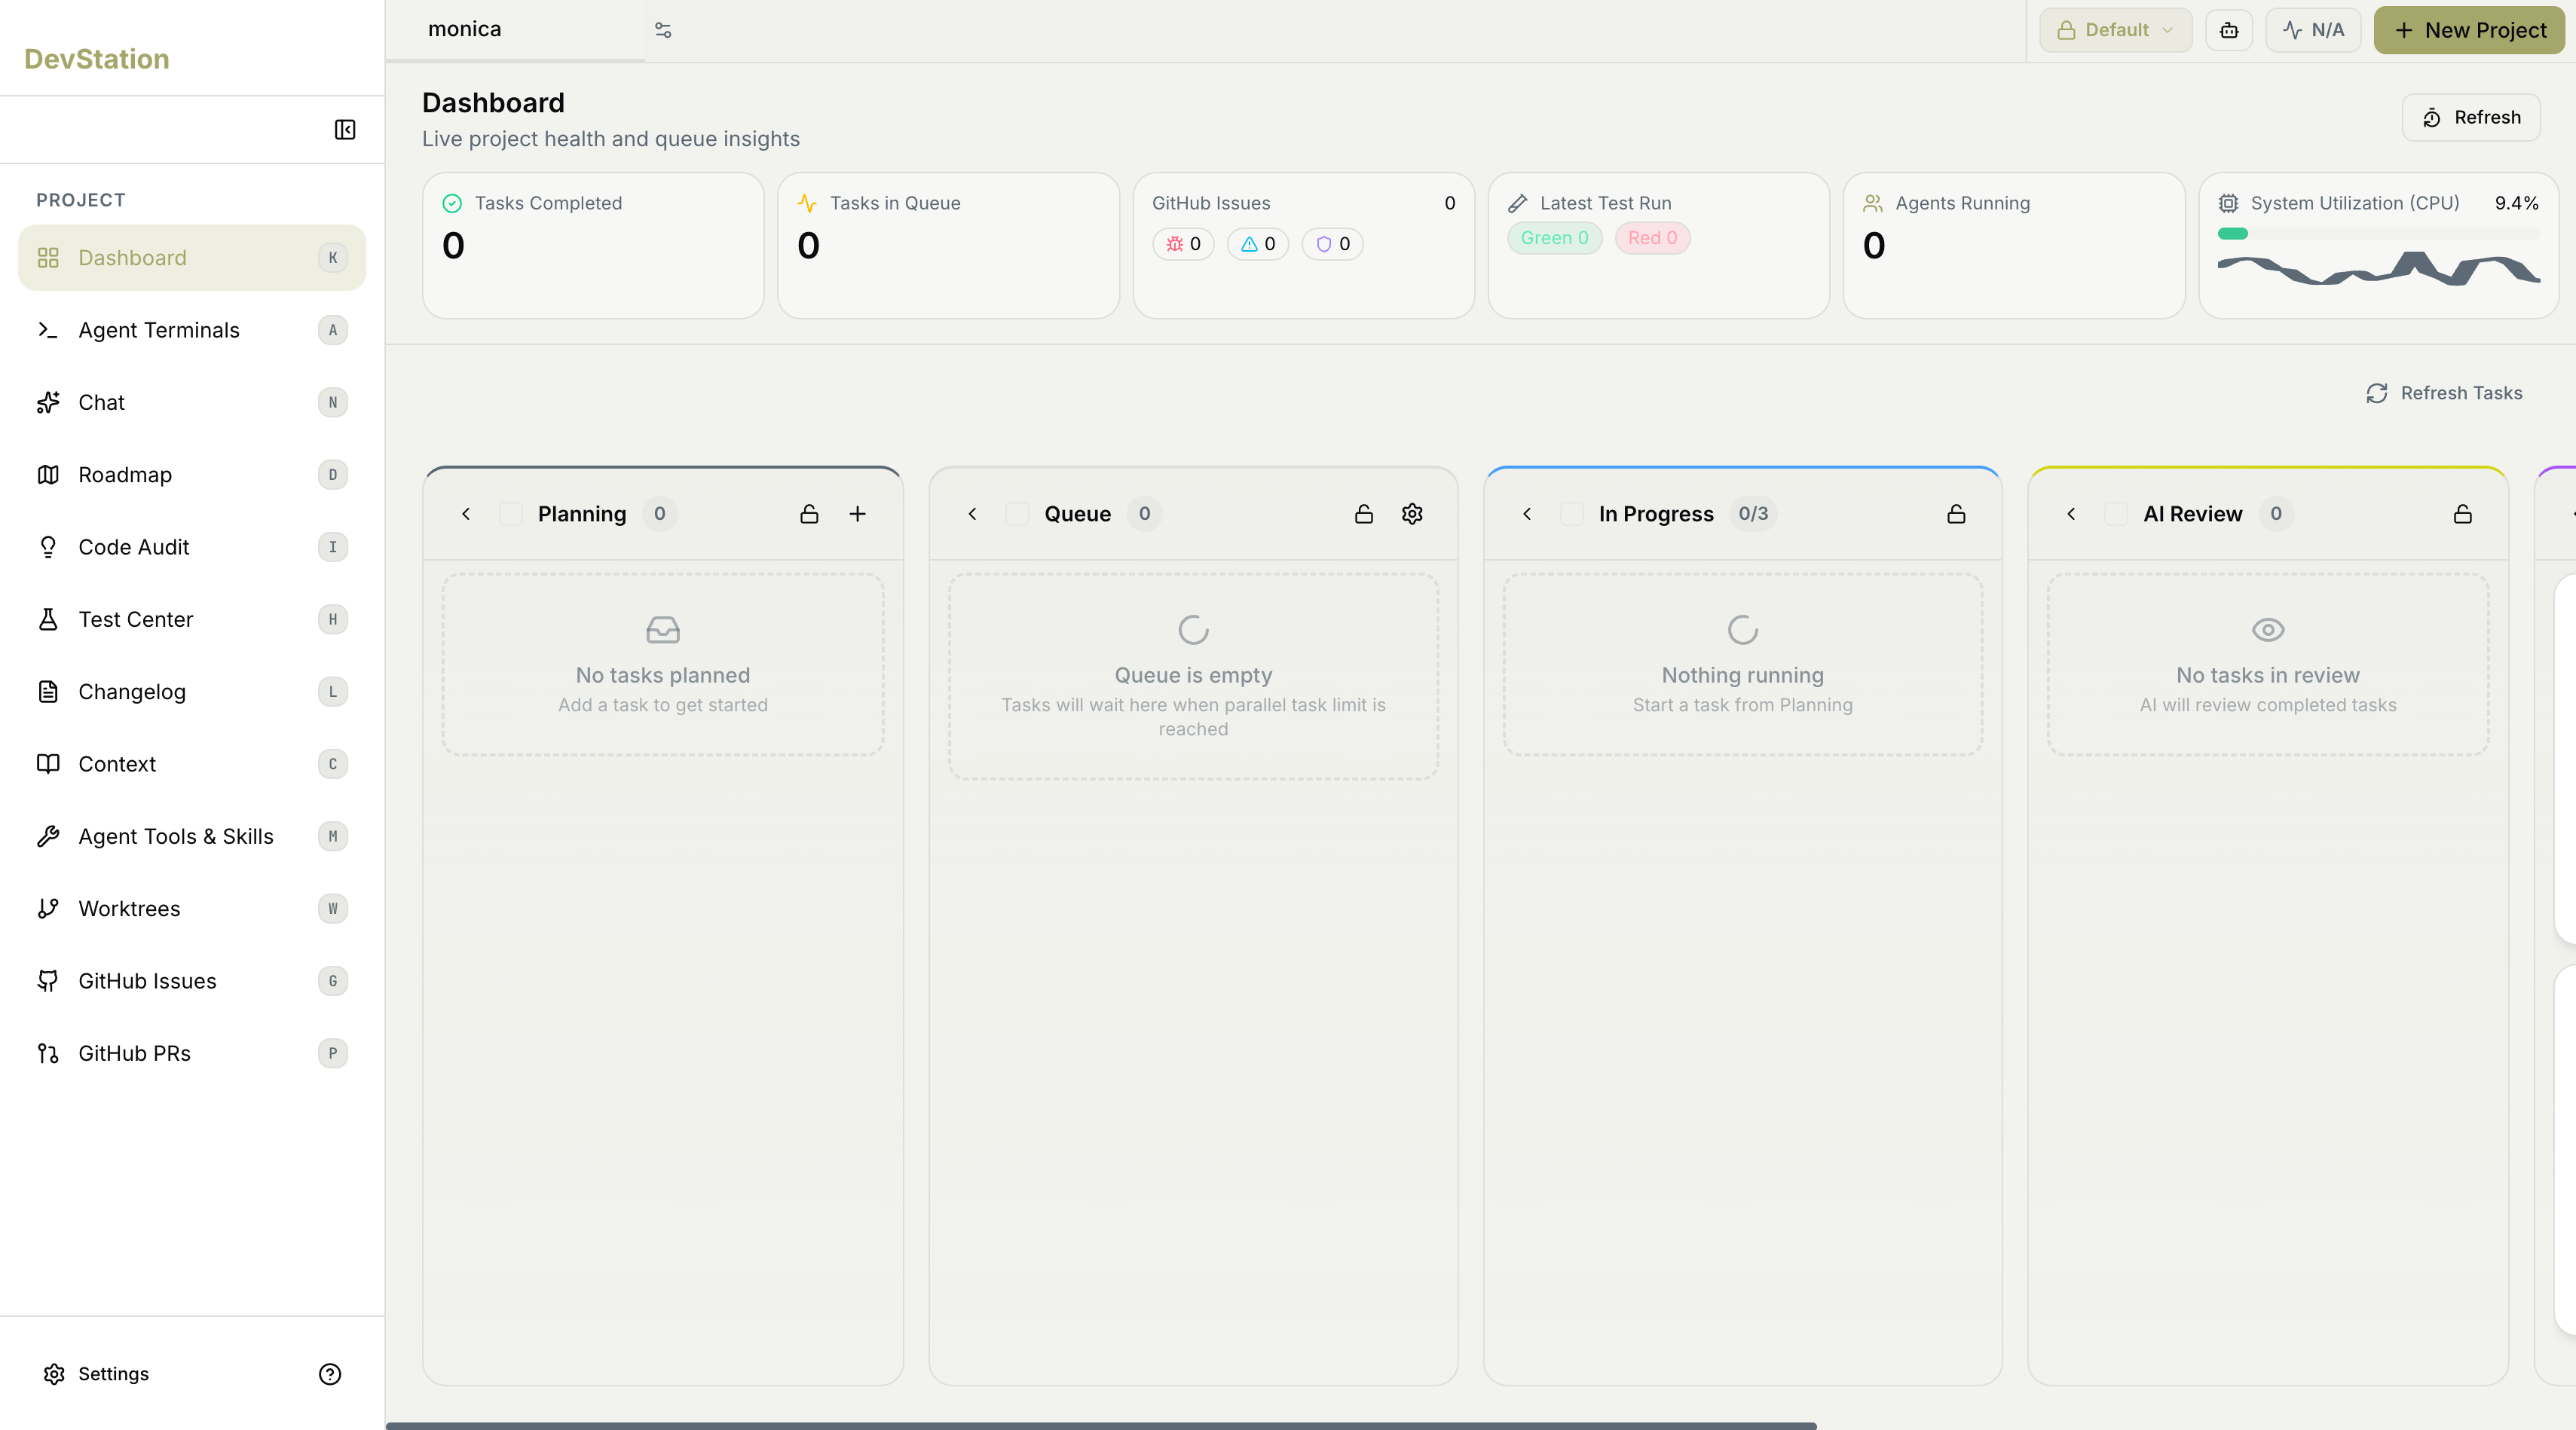 Your MyaiOne for Development project is live. Sign-in done, project created, workspace ready — from here you can add a task on the board, or jump into one of the guides below.